###The Cake That Waited
Some cakes are made to impress immediately.
They arrive tall, glossy, decorated to within an inch of their dignity, and from the moment they are set on the table, everyone understands the assignment: admire first, eat second. Napoleon was never that kind of cake.
Napoleon was a cake that asked for patience.
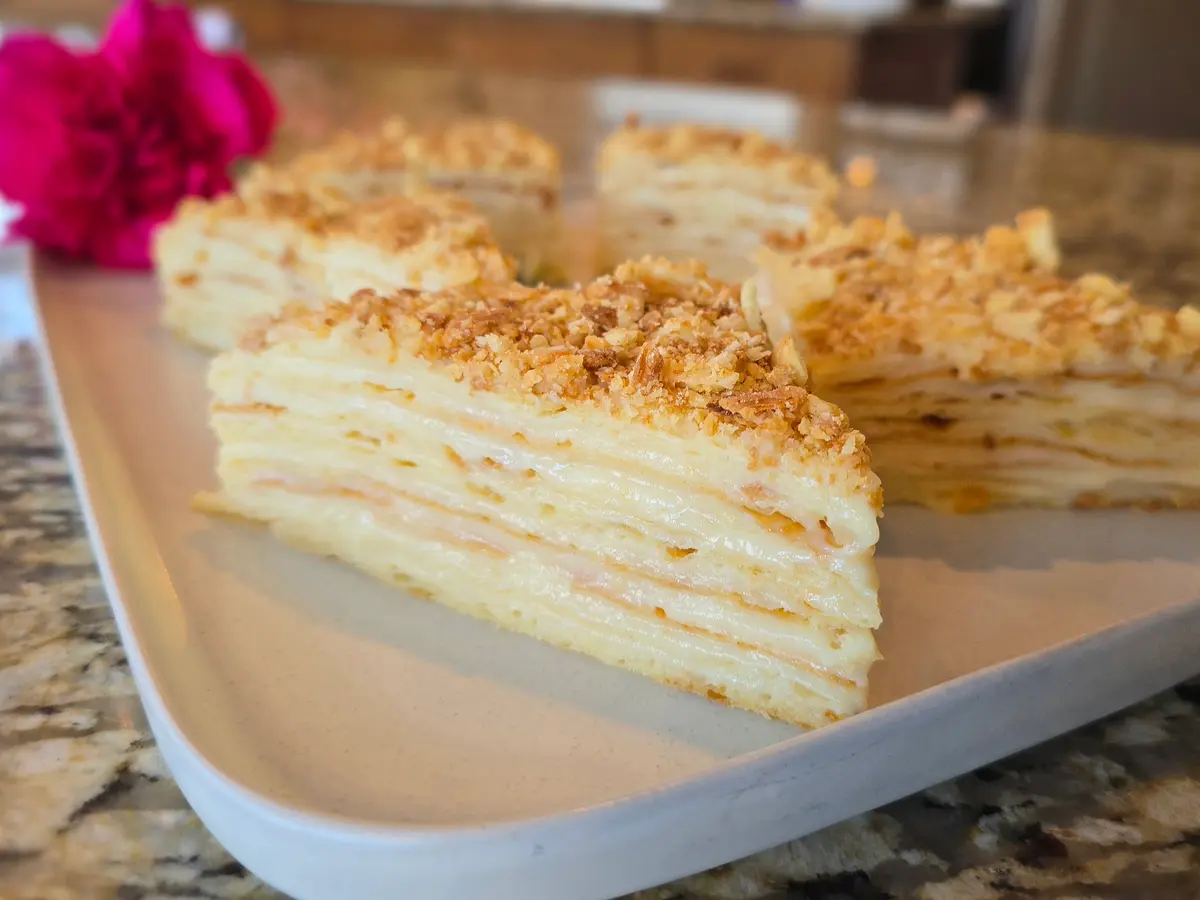
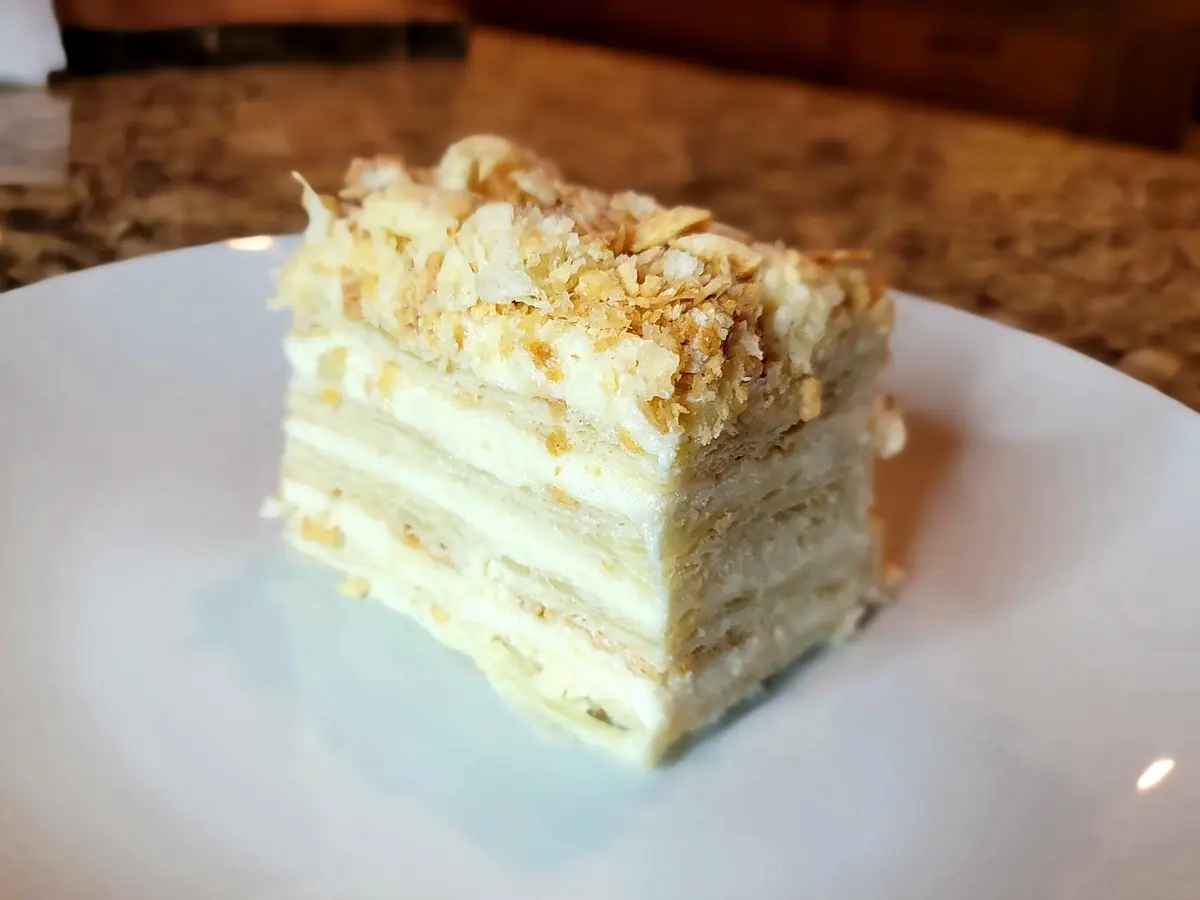
As a child, I did not fully understand this, only that it appeared in the refrigerator looking plain compared to the showier desserts—pale, crumb-covered, almost modest, as though it had been dusted with the remains of itself. It did not glitter. It did not announce chocolate, fruit, or celebration in the obvious language of children. It looked quiet, adult, serious. And yet, once cut, it revealed something I found endlessly fascinating: all those layers, so many they seemed impossible to count, sheets of pastry and cream pressed together into something far softer than either had any right to become.
That was the first magic of Napoleon.
The second was that it changed.
Freshly made, the pastry was crisp and proud, shattering into flakes. But after a long night in the cold, something miraculous happened. The cream settled in. The layers relaxed. The whole cake softened into itself, becoming tender without losing its structure, luxurious without becoming heavy. It was a dessert transformed by time, and even as a child I sensed there was something deeply important about that. Napoleon did not reward impatience. It asked to be left alone, to become itself fully before being served.
There is something almost old-world in that kind of dessert, and perhaps that is why it lingers so powerfully in memory. It belongs to a tradition of cakes that are not about instant gratification but about care, sequence, and faith. You make the pastry. You make the cream. You stack the layers. You cover the whole thing in crumbs. And then you wait. The waiting is part of the recipe, part of the identity of the cake, part of what it means to love it properly.
Growing up, that waiting made Napoleon feel important.
It was not a casual dessert. It was a cake that suggested someone had made an effort, that someone had taken time. In so many Eastern European homes, that is its own kind of love language—not loud affection, not elaborate declarations, but labor. Rolling, folding, whisking, cooling, layering. Doing something properly because the people at the table matter. Napoleon carries that spirit in every slice. It is not merely sweet; it is devoted.
And then there is the texture, which is what people remember even when they think they are remembering flavor.
Napoleon is a study in softness earned the hard way. Flaky pastry, rich pastry cream, and crumbs on top do not sound, on paper, like the components of a tender cake. They sound almost at odds with one another. But when done well, they become one of the most sensual desserts imaginable. The layers give way gently under the fork. The cream is rich but not cloying, silky but not loose. The top scatters delicate crumbs everywhere, as though insisting that elegance and mess have always belonged together. Every bite is full of contrast, yet the effect is harmony. It is impossible not to be charmed by a cake so textural, so indulgent, so unapologetically itself.
What I love most about Napoleon now is that it has outlived fashion.
It does not need reinvention. It does not need salting, scorching, deconstructing, or being stacked in a glass jar to prove its relevance. It survives because it is genuinely beloved. People still light up when they see it. They still lean in. They still say some version of the same thing: Oh, I love Napoleon. And they do. They love it not only because it is delicious, though it certainly is, but because it carries with it the feeling of a table worth gathering around. It evokes birthdays, visits, holidays, conversations in warm kitchens, plates balanced on laps, and that specific happiness of eating something that feels both celebratory and deeply familiar.
There is comfort in the fact that some cakes never stop mattering.
In a world obsessed with novelty, Napoleon remains stubbornly, gloriously old-fashioned. It asks nothing from trends. It does not try to be minimalist or ironic or impossibly chic. It simply continues being what it has always been: generous, layered, painstaking, and unforgettable. A cake that tastes of patience. A cake that rewards memory. A cake that improves with rest, as so many good things do.
Perhaps that is why it moves me still.
Because beneath the pastry and cream is a larger truth I recognize more and more with time: some of the best things in life are assembled slowly, softened by waiting, and made beautiful not by spectacle, but by devotion. Napoleon torte understands this instinctively. It knows that tenderness can come from structure, that richness can come from restraint, that crumbs can be as lovely as polish. It knows that a dessert need not shout to be adored.
And adored it is.
By children who first fall in love with the miracle of its layers. By adults who return to it for comfort and continuity. By anyone who has ever understood that the most lasting pleasures are often the quietest ones at first glance.
Napoleon was never the loudest cake in the room.
It was the cake that waited.
And somehow, that made everyone love it more.
🍳 Needed Gear

Ingredients
- 4 1/2 cups (562g) all-purpose flour
- 5 sticks plus 2 TBSP (567g) unsalted butter, cold
- 2 eggs
- 1 tsp fine salt
- 1.5 TBSP (22 ml) lemon juice
- 1 cup less 1 TBSP (227 ml) cold water
- 4 cups (960 ml) milk
- 2 vanilla beans, optional
- 4 whole eggs
- Pinch of salt
- 2/3 cup (83g) all-purpose flour
- 1 1/2 cups (300g) sugar
- 2 TBSP (28g) butter, cold, unsalted (to add to hot custard)
- 1 TBSP (15 ml) vanilla extract
- 2 1/2 sticks (284g) unsalted butter, softened, for buttercream
- 3 TBSP (24g) powdered sugar for garnishing the cake
Instructions
Pastry Dough
1Beat the eggs with a fork. Add the lemon juice and salt and whisk well. Add the water and whisk until well combined. Refrigerate until needed.
- 2
Grate the butter directly into the flour. Toss it to ensure the butter is well coated with flour. Make a small well in the middle and pour in the prepared liquid. Mix the flour and butter mixture into the liquid with a fork. Then, using your hands, quickly form everything into dough. Don't overmix it; work with it gently. Combine it by folding the dough over and over again like a letter (to create those delicate layers) rather than just kneading it. I like to fold it like a letter at least 4 times (roll it out into a rectangle, fold, repeat). Form it into a block, cover with plastic wrap, and refrigerate for at least two hours before rolling it out and baking it; but I prefer refrigerating it overnight. Alternatively, instead of forming a block, you can divide the dough into 12 portions and roll them into balls. Then refrigerate for at least two hours. You will be rolling each of these balls into about 8–9 inch (20–23cm) circles.
Baking Pastry Layers
3Divide the pastry into 3 portions (2 equal and 1 smaller portion). Divide the two equal portions in half. You will now need to roll out 4 layers about 3mm thick. For me, it worked out to 10½ x 14 inch (27 x 36cm) layers (yours might be slightly smaller or larger).
- 4
Preheat your oven to 400°F (200°C). Start by rolling out two layers, dab them gently with a wet towel, and prick all over with a fork. Place them onto half sheets and bake two sheets at a time for about 20–22 minutes. Halfway through baking, rotate the baking sheets (the top one can now go to the bottom rack and the bottom can go to the top rack) to ensure even baking. When you can lift the pastry with a fork and it doesn't bend, and when the pastry is flaky and a nice golden brown in colour, you know it's done. If you rolled your dough into 12 balls, each one will bake less—maybe about 10 minutes. Be sure to cut out the exact cake circle using an 8 or 9 inch (20 or 23cm) cake pan as your guide. Be sure to bake the pieces you cut off as well; those will be used for cake garnish.
- 5
While the layers are baking, roll out the other two layers. Repeat Step 4.
- 6
Roll out the last layer (the uneven one) to any size you like, keeping it at about 3mm thick. Repeat Step 4, but bake it for about 30 minutes—this will be used for crumbs to garnish the cake. We want it firmer and more golden, which is why we'll bake it longer. Allow all layers to cool completely.
Pastry Cream
7Split the vanilla bean in half, if using. Scoop out the seeds with a butter knife and add them to the milk. Warm the milk in a saucepan until steaming and small bubbles are just starting to form. It shouldn't boil.
- 8
In a bowl, whisk together the sugar, flour, and salt. Then add the whole eggs and whisk them into a thick pale paste, for about 4–5 minutes. Make sure the ingredients are well combined.
- 9
Carefully ladle the hot milk a bit at a time into the egg mixture, whisking constantly. It's important to add the milk slowly while whisking non-stop; otherwise your eggs will scramble. Gradual heat tempering is key. Switch back between adding more milk and whisking the custard.
- 10
Pour everything back into the saucepan you used to heat the milk and cook over medium heat, whisking constantly and being careful to scrape the bottom and corners of the pan; this should take about 3–5 minutes. When large bubbles start to appear and the custard has thickened into a thick pudding-like consistency, reduce the heat to low simmer for 30 seconds or so, then remove the pan from heat.
- 11
Strain the pastry cream into a bowl through a fine mesh sieve. Add the butter and vanilla and stir aggressively until melted and combined. Allow it to cool for about 5 minutes. Then cover the pastry cream with plastic wrap directly against its surface to prevent a skin from forming on top. Cool at room temperature until cool, just over an hour.
Buttercream
12Beat the softened butter (it has to be really soft, nearly the consistency of sour cream) in a stand mixer. Start adding the custard 1 tbsp (15ml) at a time while beating on medium-high, ensuring it's fully incorporated before adding the next tablespoon. When all the custard is added, beat on high for a minute or two. You have now made your buttercream!
Assembly
13Now for the fun part—assembling your torte! Place the first pastry layer on a large cutting board or cake base. Using a spatula, spread about 1/5 of the buttercream evenly over the layer. Place the second pastry layer on top and repeat, smoothing the buttercream between each layer. Continue with the remaining two pastry layers, adding buttercream between each one until all four layers are stacked. Use the remaining buttercream to coat the top and sides of the torte, smoothing it with your spatula for an elegant finish. You can also pipe some decorative swirls on top if you'd like.
- 14
Break up the extra golden pastry layer you baked in Step 6 into crumbs and toss with the powdered sugar. Generously sprinkle these sweetened crumbs over the top and sides of the torte, pressing them gently so they adhere to the buttercream. Refrigerate the cake for at least 12 hours or ideally overnight for it to be soft and moist and to ensure the cake layers absorb the buttercream beautifully. I like letting this cake come to room temperature for an hour before serving, but serving straight from the fridge also works well. Enjoy!
Questions, Comments & Compliments
FAQ
Looking for more? Explore the full collection — filter by lifestyle, cuisine, or dietary needs.