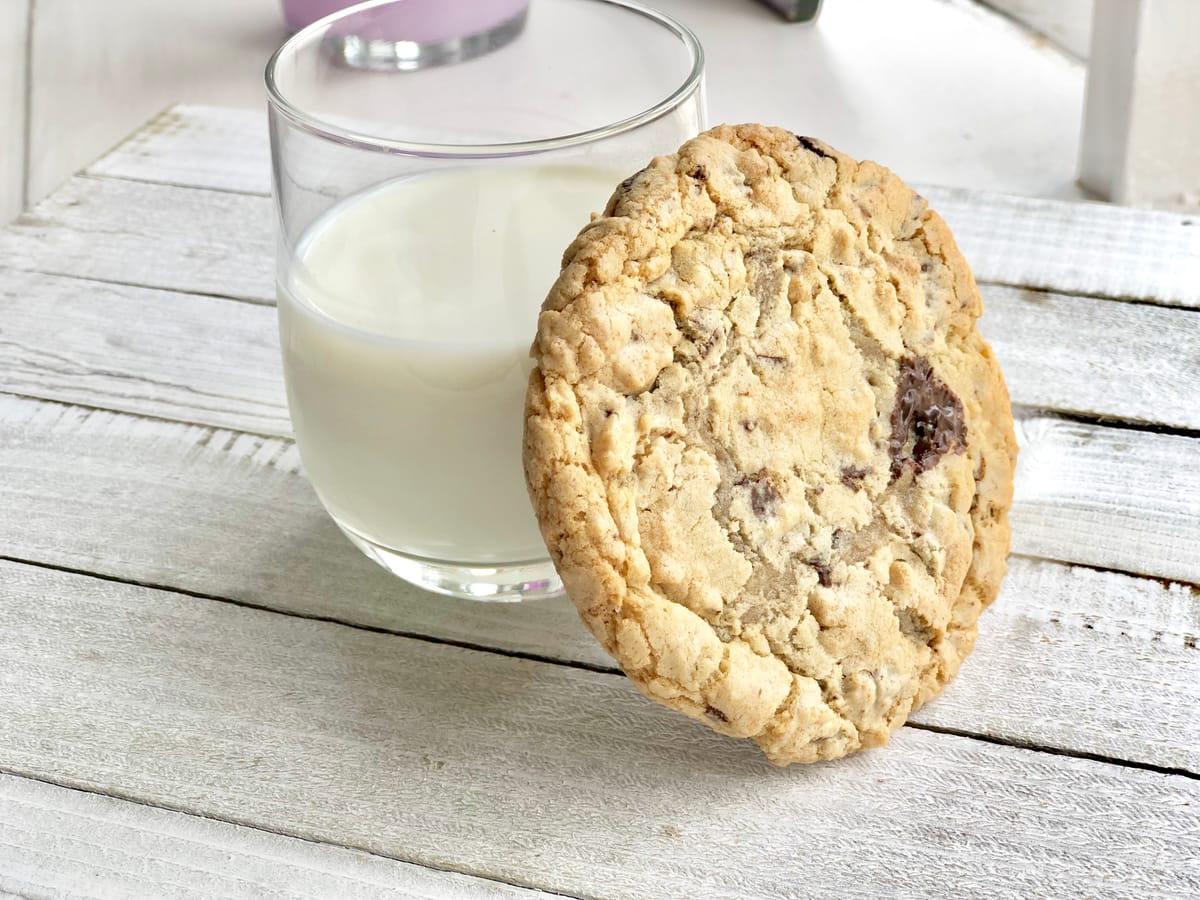
Chocolate Chip Cookie
My signature cookie. Easy and quick to make (no overnight wait that I had in my prior cookie recipes). It's tender and chewy and reminds me very much of the Subway cookie.
My signature cookie. It's easy and quick to make—no overnight waiting like in my earlier cookie recipes. The cookies are tender and chewy, and they remind me very much of the Subway cookie.
Ingredients
- 2 1/4 cups (280 g) flour
- 1 tsp (5 g) baking soda
- 1 cup (227 g) butter, unsalted and at room temperature
- 1/2 cup (100 g) light brown sugar
- 1 cup (200 g) white sugar
- 1 tsp (6 g) kosher salt
- 2 eggs
- 2 tbsp (30 ml) milk
- 1 1/2 tsp (7.5 ml) vanilla
- 2 cups (340 g) chocolate chips (I use semi-sweet, but you can use whatever you like—even an assortment of white and semi-sweet chocolate)
Instructions
- 1
Combine the flour and baking soda and mix well in a small bowl.
- 2
Cream the butter, sugar, brown sugar, and salt until light and fluffy.
- 3
Switch to a wooden spoon and mix in the eggs, one at a time.
- 4
Then add the milk and vanilla, mixing well with a wooden spoon.
- 5
Place a fine mesh sieve over your butter and sugar mixture. Sift in the flour and baking soda.
- 6
Start gently folding the flour into the batter without overworking or over-mixing the dough. You can do this in a stand mixer mixing very slowly with a paddle attachment.
- 7
When the flour is about 75% incorporated, add the chocolate chips and continue mixing until just combined with no trace of flour remaining.
- 8
Divide the dough into two portions. Form a five-inch (13 cm) disk (about 1.5 inches (4 cm) tall) from each portion.
- 9
Place each portion in a separate ziplock bag and refrigerate for an hour.
- 10
Preheat the oven to 360°F (182°C).
- 11
Line two baking sheets with parchment paper. I like to turn the sheets upside down without the rim obstructing them – it will be easier to slide the cookies onto the parchment once they are baked.
- 12
Scoop out the dough with a rounded 3 tablespoon (45 ml) ice cream scoop, making large cookies that are all the same size. Take each piece, rip it apart in the middle, then stick the two pieces together, exposing sharp ripped edges. Try to make somewhat of a ball when forming each cookie, but without flattening all the rough edges. It will give your cookie that professional appearance and an incredible texture. I like baking these cookies one sheet at a time.
- 13
Place eight scooped cookies (from Step 12) on a prepared sheet.
- 14
Bake in the preheated oven for 10–15 minutes, until the edges start to brown but the centres are still very soft. The cookie will harden a lot, so there is no need to over-bake. Time varies based on the cookie size, how cool it is, and the oven temperature.
- 15
Remove from the oven.
- 16
Leave the cookies in the pan for exactly 5 minutes. Then slide the whole parchment paper onto a wire rack to cool. Go ahead and bake that second batch. Grab a glass of milk and enjoy!
📝 Ellen's Notes
Dough Temperature for Different Textures
The temperature of your dough when you bake affects the final texture. For thicker, chewier cookies, chill the dough to 50–58°F (10–14°C). For cookies with a standard spread and lighter chew, aim for 60–68°F (15–20°C). A cooler dough spreads less and yields a thicker cookie, while slightly warmer dough will spread more.
Pro Tip on Portioning
For the best results, portion your dough first (using the ice cream scoop as described in Step 12), then chill the scooped portions on a baking sheet. This way, the shaped dough gets properly chilled without the extra step of chilling a large disk and re-scooping. It saves time and ensures even baking.
Doneness
These cookies are done when the edges are golden brown but the centres still look slightly underbaked—they'll continue cooking on the pan. If you prefer a firmer centre, you can probe with a toothpick; it should meet light resistance but not be hard.
FAQ
Did you try this recipe?
Leave a star rating — it helps other cooks find it!
Comments


Looking for more? Explore the full collection — filter by lifestyle, cuisine, or dietary needs.