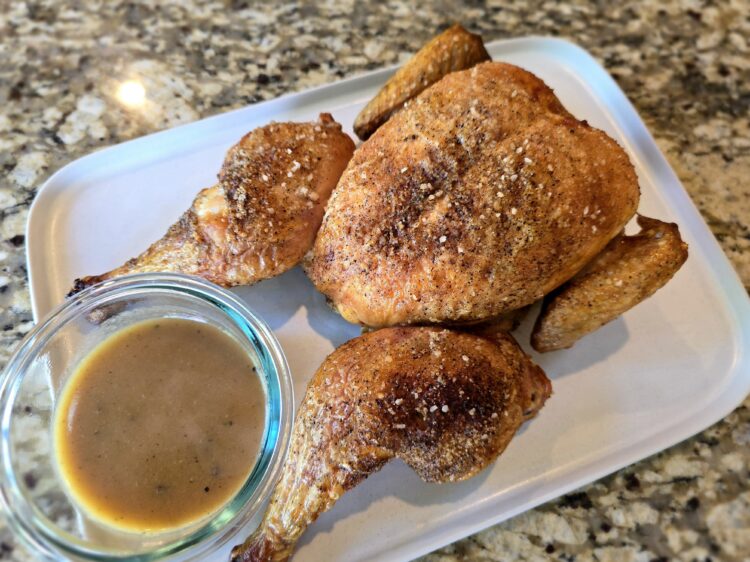
What a simple yet absolutely delicious way to make roasted chicken! It’s a totally foolproof recipe that always comes out crispy and juicy!
Preheat the oven to 425. Place the oven rack to the to upper third of the oven. Line a baking sheet with aluminum foil. Ideally, place oven safe racks that fit into the baking sheet so that the chicken can lay on top of them, this will help to cook the chicken more evenly as the air will circulate all around the chicken.
Remove the spine of your chicken with a sharp knife - this way you will be "butterflying" your chicken. It's quite easy to do but you may ask your butcher to do this for you. Reserve this spine to make stock or gravy.
Consider using this spine to make a batch of my quick gravy to go along with this chicken.
Dry the chicken with the paper towels. Season the chicken with salt and pepper and rub with oil. Place on prepared baking sheet. Press down on the breasts with your hands flattening the chicken. Bake in preheated oven for 40-50 minutes.
Check your chicken after about 40 minutes. You are looking to get to the internal temperature of 165 at the breast and 170 in the thigh (it's safe to eat chicken at 165, however, the meat of the thighs is still a bit too chewy at that temperature.) Allow the chicken to rest uncovered for at least 5 minutes for the juices to distribute evenly. Serve and enjoy!
Ingredients
Directions
Preheat the oven to 425. Place the oven rack to the to upper third of the oven. Line a baking sheet with aluminum foil. Ideally, place oven safe racks that fit into the baking sheet so that the chicken can lay on top of them, this will help to cook the chicken more evenly as the air will circulate all around the chicken.
Remove the spine of your chicken with a sharp knife - this way you will be "butterflying" your chicken. It's quite easy to do but you may ask your butcher to do this for you. Reserve this spine to make stock or gravy.
Consider using this spine to make a batch of my quick gravy to go along with this chicken.
Dry the chicken with the paper towels. Season the chicken with salt and pepper and rub with oil. Place on prepared baking sheet. Press down on the breasts with your hands flattening the chicken. Bake in preheated oven for 40-50 minutes.
Check your chicken after about 40 minutes. You are looking to get to the internal temperature of 165 at the breast and 170 in the thigh (it's safe to eat chicken at 165, however, the meat of the thighs is still a bit too chewy at that temperature.) Allow the chicken to rest uncovered for at least 5 minutes for the juices to distribute evenly. Serve and enjoy!
Notes
The gravy recipe is here. It’s so easy to make and it cooks in the same amount of time that’s required to make this chicken. What a perfect match!
Heat butter in a pot over medium to medium-high heat. Add your mirepoix - onion, celery and carrots. Cook for 5-8 minutes or so until well browned, stirring often. Be careful not to burn.
Turn the heat to medium, sprinkle the flour over the veggies and continue cooking, stirring constantly, for another 5 minutes or so, to cook off the raw flour taste and allow the flour to slightly brown (aim for golden brown colour, but do not burn.)
NOTE: if you have trimmings, bones, chicken carcass - sear it until golden and well browned before searing the veggies, remove to a plate and add in step 2 after you have added the stock. The addition of these things will further intensify the flavour of the gravy, however, add another 20 minutes to the preparation.
Pour about 1/3 cup of stock very slowly while stirring vigorously. The goal is to work out all the little bits of flour into thick paste. Keep adding stock in a steady slow stream while stiring vigorously and working out any lumps that may form. THIS IS IMPORTANT - DO NOT RUSH ADDING THE LIQUID. Add bay leaves and dried thyme. Bring everything to a boil, reduce to simmer and simmer uncovered for 25-45 minutes, the longer - the better, but the flavours will start coming together after just 20 minutes or so for this delicious quick gravy. Keep stirring your gravy every couple of minutes to prevent scorching the pot. If the gravy reduces too much, you can always add more stock to thin it out and reach your desired consistency.
Pass the gravy through a fine mesh sieve, pressing down on the vegetables to extract as much liquid as possible. Add soy sauce, if using. Season your gravy to taste with salt and pepper.
The amount of flour is correct in this recipe. Some recipes call for double the amount of flour. But this recipe extracts the flavour with a lengthy simmering process (at least 25 minutes as per step 2,) so your gravy will reduce and thicken.
Ingredients
Directions
Heat butter in a pot over medium to medium-high heat. Add your mirepoix - onion, celery and carrots. Cook for 5-8 minutes or so until well browned, stirring often. Be careful not to burn.
Turn the heat to medium, sprinkle the flour over the veggies and continue cooking, stirring constantly, for another 5 minutes or so, to cook off the raw flour taste and allow the flour to slightly brown (aim for golden brown colour, but do not burn.)
NOTE: if you have trimmings, bones, chicken carcass - sear it until golden and well browned before searing the veggies, remove to a plate and add in step 2 after you have added the stock. The addition of these things will further intensify the flavour of the gravy, however, add another 20 minutes to the preparation.
Pour about 1/3 cup of stock very slowly while stirring vigorously. The goal is to work out all the little bits of flour into thick paste. Keep adding stock in a steady slow stream while stiring vigorously and working out any lumps that may form. THIS IS IMPORTANT - DO NOT RUSH ADDING THE LIQUID. Add bay leaves and dried thyme. Bring everything to a boil, reduce to simmer and simmer uncovered for 25-45 minutes, the longer - the better, but the flavours will start coming together after just 20 minutes or so for this delicious quick gravy. Keep stirring your gravy every couple of minutes to prevent scorching the pot. If the gravy reduces too much, you can always add more stock to thin it out and reach your desired consistency.
Pass the gravy through a fine mesh sieve, pressing down on the vegetables to extract as much liquid as possible. Add soy sauce, if using. Season your gravy to taste with salt and pepper.
The amount of flour is correct in this recipe. Some recipes call for double the amount of flour. But this recipe extracts the flavour with a lengthy simmering process (at least 25 minutes as per step 2,) so your gravy will reduce and thicken.


