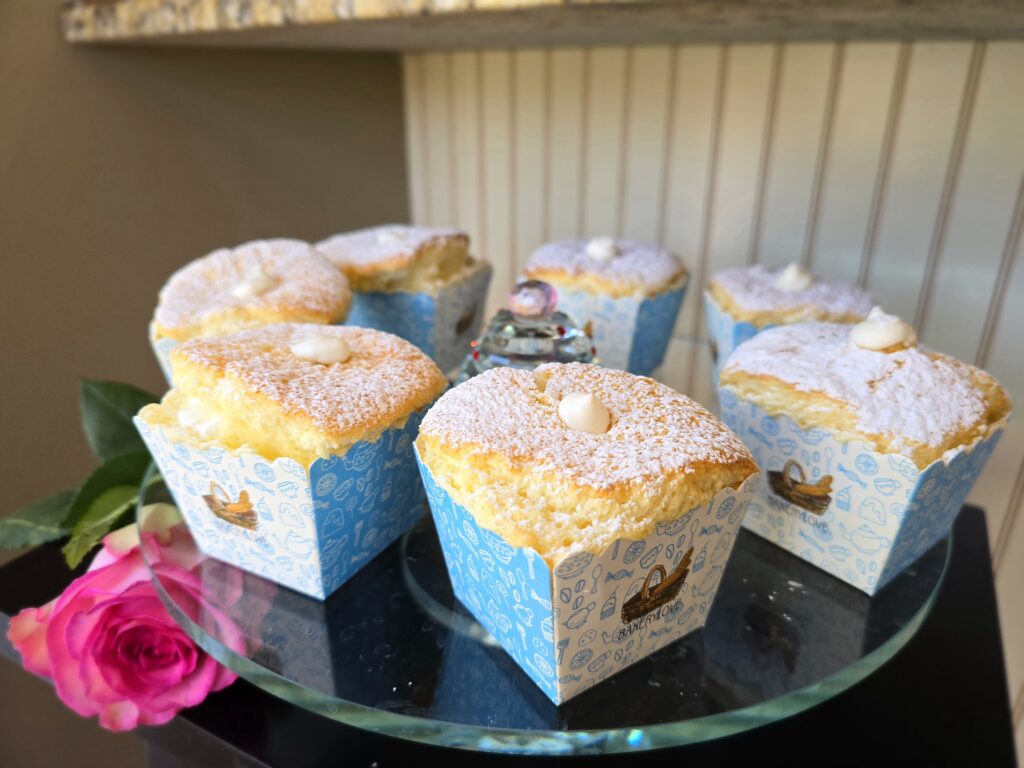
Fluffy Japanese Cakes with a Cool Cream Center
These cupcakes are everything I want in a sponge: light but not flimsy, moist but never greasy, and milky without being overly sweet. The structure comes from a stable meringue and just the right amount of oil to soften the crumb.
The cream center is simple, but the chill adds contrast — cool against the warmth of a freshly baked cake. I tested different ratios of yolks, milk, and oil to get the base soft yet strong enough to hold its shape. And adding condensed milk to the whipped cream adds a subtle milky sweetness and a silky, custard-like finish — echoing the flavor of the sponge while giving the filling a bit more body and depth.
Japanese baking like this evolved with European influence, but the spirit of it feels older — gentle, layered, and quiet.

Hokkaido Chiffon Cupcakes
6-9
servingsIngredients
Dry Ingredients
70g cake flour (½ cup + 1 tbsp) (spooned and leveled), sifted
1 tsp milk powder (optional, for extra milky flavor)
Pinch of salt(spooned and leveled), siftedEgg Yolk Mixture
3 large egg yolks
35g granulated sugar (2 tbsp + 2 tsp)
45 ml neutral oil (3 tbsp)
90 ml whole milk (6 tbsp)
¾ tsp vanilla extractMeringue Mixture
3 large egg whites
¼ tsp cream of tartar
45g granulated sugar (3 tbsp + 2 tsp)Stabilized Whipped Cream Filling
¾ tsp powdered gelatin
1 tbsp cold water
1 cup (240 ml) heavy cream (33–36% fat, very cold)
2 tbsp sweetened condensed milk (adjust to taste)
½ tsp vanilla extract
Pinch of fine salt (optional but recommended)- Powdered sugar and fresh fruit, for serving
Directions
- Prep
Preheat oven to 325°F (163°C).
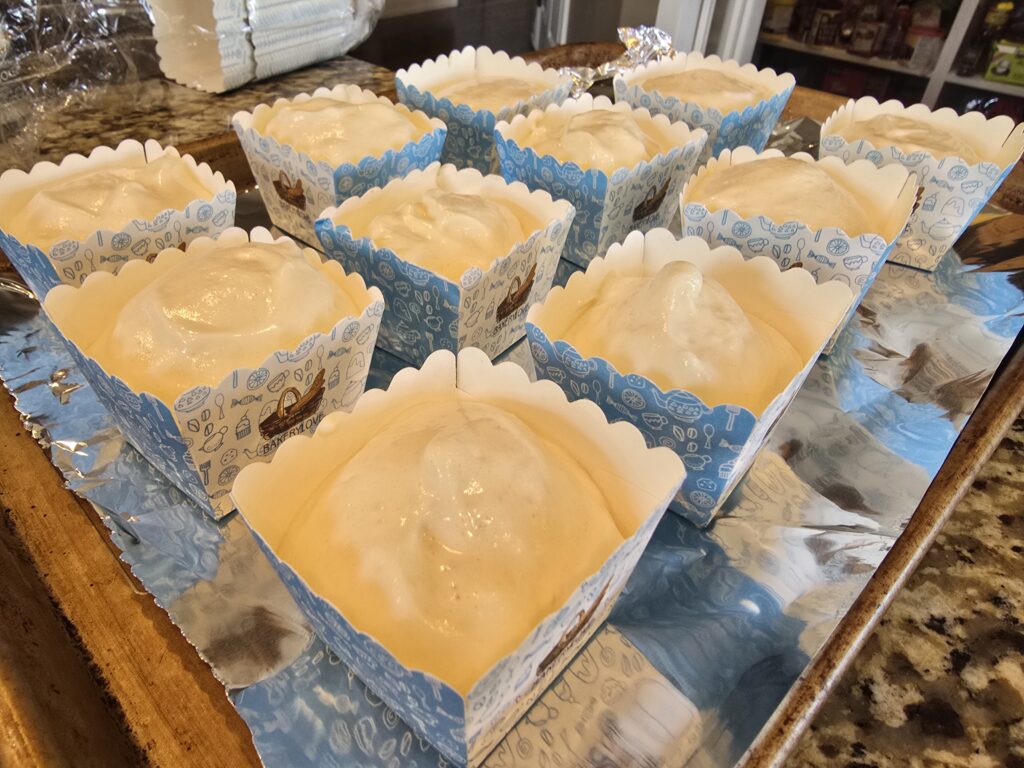
Place 7–10 tall paper cupcake cups on a baking sheet (not a muffin tin).
Sift together flour, milk powder, and salt. Set aside. - Make the Meringue
The goal is a smooth, glossy meringue that forms stiff peaks — not foamy, dry, or grainy. Start on low speed (Speed 2–3) for 30–60 seconds to loosen the egg whites and form small, stable bubbles. Increase to medium speed (Speed 4–5), add cream of tartar here and beat for 1–2 minutes, or until you see soft peaks begin to form. Next, increase to medium-high speed (Speed 6–8) and gradually add the 50g sugar over 2–3 minutes, one spoonful at a time. After all the sugar has been incorporated, continue beating at the same speed for another 2–3 minutes, or until the meringue is glossy and forms stiff peaks that stand straight up without collapsing. The mixture should cling to the bowl, feel smooth (not grainy), and have a slight sheen. Avoid overbeating, which can dry out the foam and make folding difficult. - Make the Yolk Base
In a large bowl, whisk egg yolks + 2 tbsp sugar until pale and thick (3–5 min). You want them pale and slightly thickened, but 3–5 minutes usually suffices unless you’re aiming for a genoise-like structure. Over-whipping can introduce too much air and destabilize your structure later.
Add oil and vanilla; whisk until smooth.
Add milk and whisk to combine.
➤ Add Flour in Two Batches with Hand Mixer (Low Speed)
Sift in half the dry mix and whisk very gently, just until combined.
Sift in the remaining flour and mix again. Do not overmix. - Fold and Fill
Fold ⅓ of meringue into yolk mixture to lighten.
Gently fold in remaining meringue until fully combined.
Spoon into cups, filling each 80-90% full. I like using a medium ice cream scoop for the job. - Bake
Bake at 325°F for 18-22 minutes, or until:
Tops are matte and slightly cracked
A toothpick inserted comes out clean or with dry crumbs
Internal temp reaches 200°F (93°C)
Cool fully on a wire rack before filling. I like cooling my cupcakes upside down. However, if they came up above the rim, let it cool standing up then after 7-10 minutes or so, place them to finish cooling on their sides. - Make Stabilized Cream
Bloom gelatin: In a small heatproof bowl, sprinkle gelatin over cold water. Let sit for 5 minutes to bloom.
Melt gelatin: Microwave the bloomed gelatin for about 5–8 seconds until just dissolved (do not let it boil). Stir and let cool slightly—it should still be liquid but not hot. I like adding a few tablespoons of my cream into this mixture and stirring it well - this optional step makes it incorporate better.
Whip cream base: In a chilled bowl, beat the heavy cream with vanilla, salt, and condensed milk on medium speed until soft peaks form.
Add gelatin: With the mixer running, slowly drizzle in the cooled gelatin. Continue whipping until medium-stiff peaks form.
Use immediately or chill: Pipe into cupcakes or use to fill rolls. It will firm up further in the fridge over 1–2 hours. - Fill the Cupcakes 1-3 hours before serving and up to 8 hours.
Use a piping bag with a narrow tip.
Insert into center of each cooled cupcake and pipe until slightly puffy and cream peeks out.
Dust with powdered sugar before serving.
Notes
- Light-as-air Japanese chiffon cupcakes filled with softly sweetened stabilized whipped cream. Perfect for a delicate, milky treat.
Store filled cupcakes in the fridge in a covered container. Best enjoyed the same day. - If serving within 1 to 2 hours, you can skip the gelatin and simply use regular whipped cream. Stabilizing is only needed for longer hold or warm environments.
- How Hard to Whip Egg Whites:
Overwhipped egg whites make folding difficult, risking deflating the batter, creating a denser final product.
Ideal Meringue Stage:
Whip to stiff glossy peaks, but no further.
The ideal meringue should:
Hold peaks firmly upright when the beaters are lifted.
Still appear glossy, creamy, and smooth, not grainy or lumpy.
Easily release from the whisk or beaters.
Signs of Overwhipping:
Grainy or dry appearance.
Clumps form, and whites stick stubbornly to the bowl and whisk.
Peaks look brittle, dry, or curdled.
Tips to Avoid Overwhipping:
Stop frequently towards the end to check peak consistency.
Switch to lower speed when nearing stiff peaks.
Once glossy and stiff peaks form, immediately stop whipping.