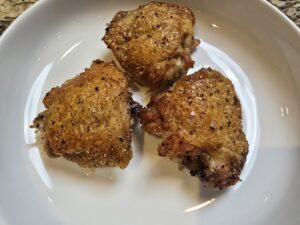
If you want to elevate your chicken dinner into a backyard BBQ sensation, look no further than beer can chicken! This recipe isn’t just about tender, juicy meat and perfectly crisp skin—it’s also a conversation starter. All you need is a few simple ingredients and a bit of patience to achieve a dish that’s packed with flavor and sure to impress.
You might have seen pictures of a whole chicken propped up on a beer can, and there’s a reason for this unique setup. The steam from the beer keeps the chicken moist from the inside, while the outside roasts to crispy perfection. It’s a win-win situation for both flavor and texture!
Simple steps!
- Preheat and Prep.
- Season the Bird.
- Mount on the Can.
- Grill It Up.. for about 1-1.5 hours.
- Rest & Serve.
Pro Tip
Try experimenting with different beer types! A light lager will give you a subtle flavor, while a dark stout will add a richer, deeper taste. Want to change it up? Swap the beer for a can of lemon-lime soda, coke or root beer for a unique twist!
Final Thoughts
Beer can chicken is a surefire way to impress your friends and family at your next BBQ. It’s flavorful, fun, and surprisingly easy to make. So, grab a chicken, crack open a cold one, and let’s get grilling!
Prepare the grill for indirect heat. Turn all the burners to high except 1-2 burners (depending on how wide your gas grill is,) so that the 9x13 baking sheet could be placed on top of the grill with no direct heat under it.
Dry the chicken skin with paper towels. Rub the chicken with the spice rub. Sprinkle some of the spice rub inside the cavity of the chicken. Try to slide some of the rub under the skin of the chicken to flavour the meat directly, but be careful not to break the skin. If possible, allow the chicken to “dry-brine” and refrigerate it uncovered for a couple of hours or up to overnight after you seasoned it with the spice rub.
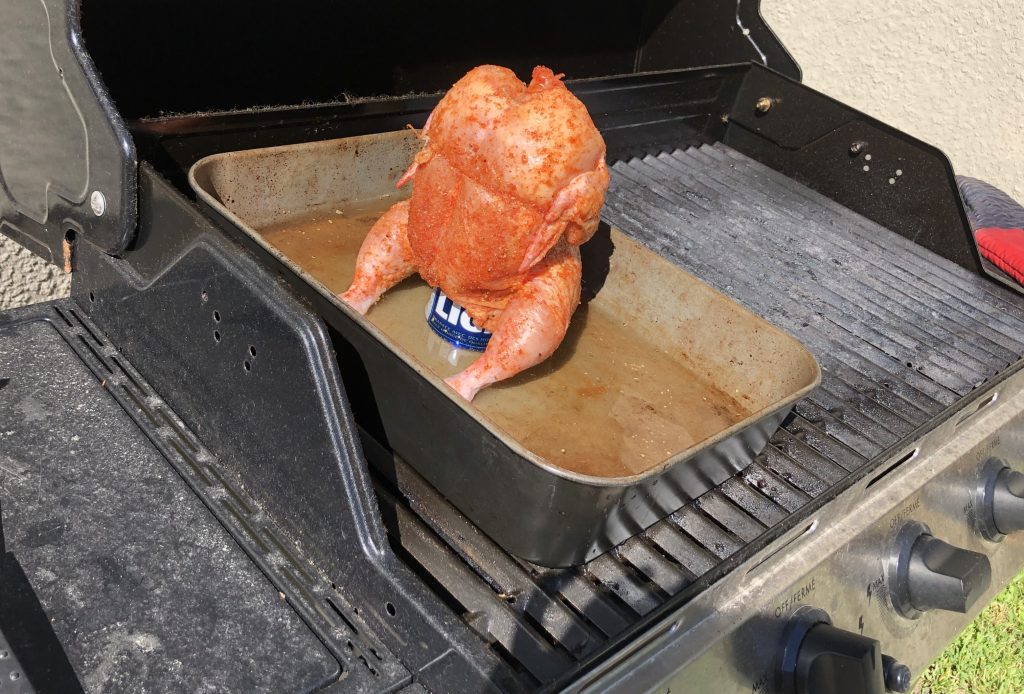
Pour out half of the beer (or drink it) and gently insert the beer can inside the cavity of the chicken, the legs of the chicken should be facing down. Your chicken should rest on top of the beer can upright without falling. Place your chicken into 9x13 oven-safe aluminum pan (or disposable one.) Pour about 1/4-1/2” of water into the pan and transport the whole pan to your grill. The pan should go into the indirect heat area with unlit burners under it. Turn the breast away from the side where the burners are on. Cover the grill and grill undisturbed for 40 minutes. Target temperature of the grill should be 425-450°.
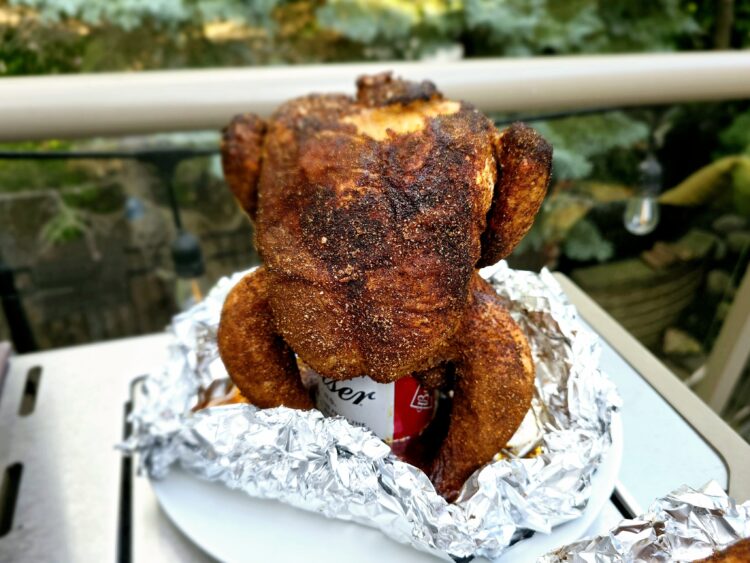
*See the picture attached, the chicken is facing away from the heat source:
After that time, turn the chicken so that the breast is now facing the side with the burners on. Measure the internal temperature of the chicken. You are aiming to get 165 at the breast and 170-175 in the thigh (although it’s safe to eat at 165, the connective tissue is still chewy and not sufficiently broken down.) It won’t be long. The total cooking time is somewhere between 45-60 minutes (depending on the size of the bird and other variables.)
Allow the chicken to rest for 7-10 minutes before removing the beer (be careful as it will be hot) and carving it.
I’m undecided about the use of water. It catches the drippings as well as seems to make the chicken even more juicy. However, all the moisture and steam from the water, prevent the chicken from getting extra crispy. Feel free to skip adding the water to your 9x13 baking dish if extra crispy skin is your goal. Your chicken may take longer to cook without the water, as all the extra steam helps cook the chicken faster.
Ingredients
Directions
Prepare the grill for indirect heat. Turn all the burners to high except 1-2 burners (depending on how wide your gas grill is,) so that the 9x13 baking sheet could be placed on top of the grill with no direct heat under it.
Dry the chicken skin with paper towels. Rub the chicken with the spice rub. Sprinkle some of the spice rub inside the cavity of the chicken. Try to slide some of the rub under the skin of the chicken to flavour the meat directly, but be careful not to break the skin. If possible, allow the chicken to “dry-brine” and refrigerate it uncovered for a couple of hours or up to overnight after you seasoned it with the spice rub.
Pour out half of the beer (or drink it) and gently insert the beer can inside the cavity of the chicken, the legs of the chicken should be facing down. Your chicken should rest on top of the beer can upright without falling. Place your chicken into 9x13 oven-safe aluminum pan (or disposable one.) Pour about 1/4-1/2” of water into the pan and transport the whole pan to your grill. The pan should go into the indirect heat area with unlit burners under it. Turn the breast away from the side where the burners are on. Cover the grill and grill undisturbed for 40 minutes. Target temperature of the grill should be 425-450°.
*See the picture attached, the chicken is facing away from the heat source:

After that time, turn the chicken so that the breast is now facing the side with the burners on. Measure the internal temperature of the chicken. You are aiming to get 165 at the breast and 170-175 in the thigh (although it’s safe to eat at 165, the connective tissue is still chewy and not sufficiently broken down.) It won’t be long. The total cooking time is somewhere between 45-60 minutes (depending on the size of the bird and other variables.)
Allow the chicken to rest for 7-10 minutes before removing the beer (be careful as it will be hot) and carving it.
I’m undecided about the use of water. It catches the drippings as well as seems to make the chicken even more juicy. However, all the moisture and steam from the water, prevent the chicken from getting extra crispy. Feel free to skip adding the water to your 9x13 baking dish if extra crispy skin is your goal. Your chicken may take longer to cook without the water, as all the extra steam helps cook the chicken faster.
