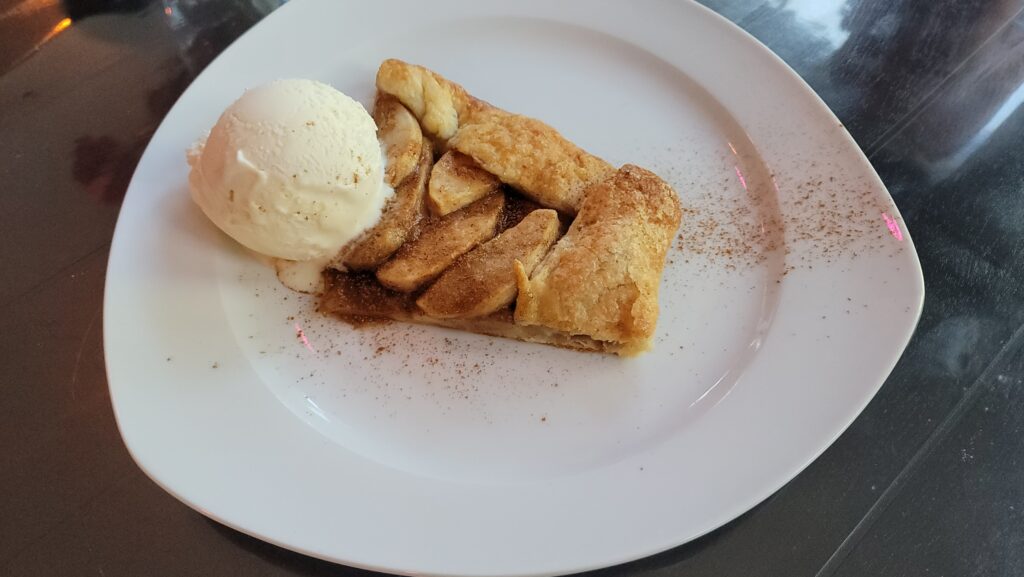
My apple pie is seriously delicious. But I have something just as delicious, easier, quicker and more reasonably sized! Beautiful crisp buttery layers of the pastry with sweet and delicious apple pie filling!
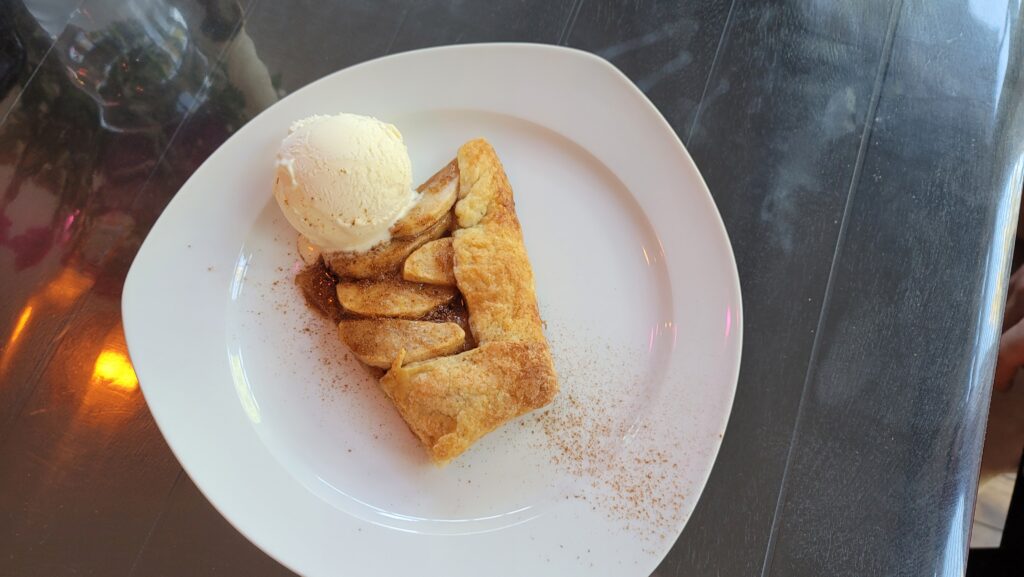
And you have yourself delicious, rustic, to die-for apple crostata that’s so much easier and quicker to make! I declare this the best rustic pie or crostata ever!
Roll your pie crust to about 12" circle in diameter. Place it on an inverted baking sheet, cover with plastic wrap and refrigerate for at least an hour.
Combine apples, lemon juice, lemon zest, salt, cinnamon, nutmeg, coves, allspice, sugars. Toss well. Allow to sit at room temperature for at least half an hour. I usually let it sit even a bit longer, up to two hours. This process is called maceration and after just half an hour, the juices will be drawn out from the apples and collect on the bottom of your bowl. By doing this step, we help prevent soggy bottom crust.
Carefully strain these delicious fragrant juices into a small saucepan and simmer to thicken them up slightly. Perhaps 3-4 minutes over medium-low heat. Be careful not to reduce too much - we are simply looking to thicken this "apple caramel" slightly.
Toss apples with flour.
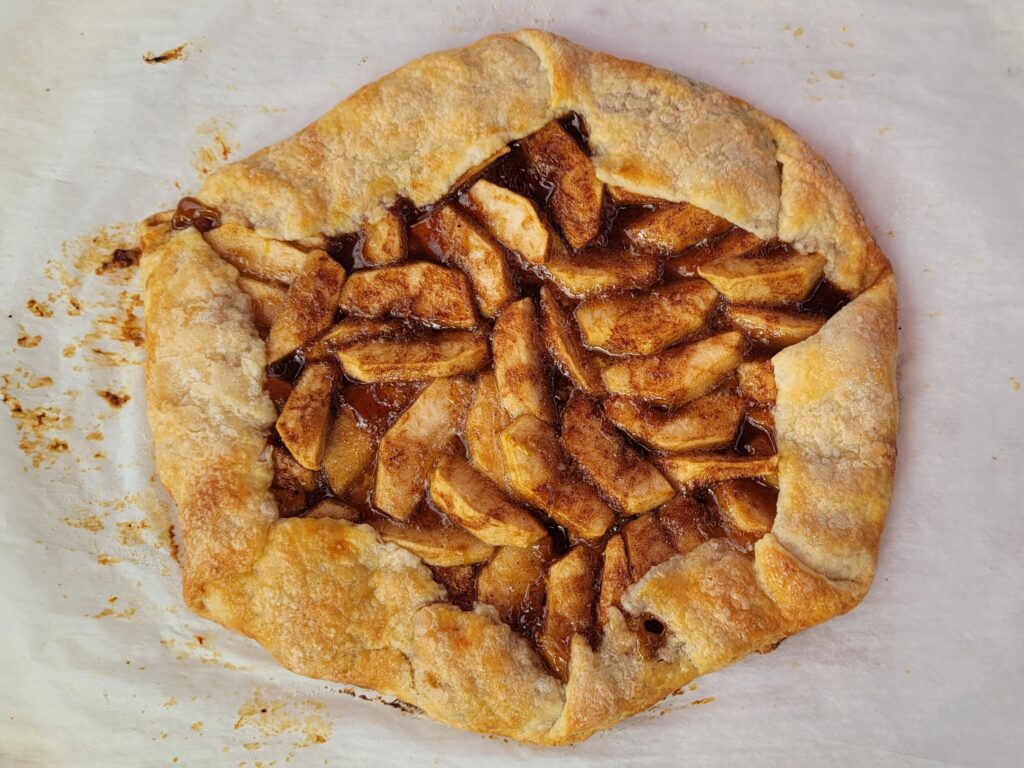
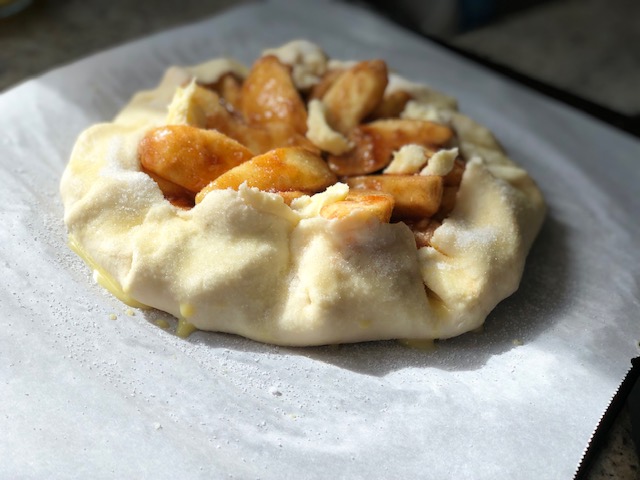
Take the crust out of the fridge and fill the crust with apples leaving 1 1/2" - 2" of the crust unfilled. Your apples will guide the shape of the crostata, and 3 apples typically form 8" circle placed in a single layer. Gently pour your "apple caramel" over the apples. Dot your apple filling with butter. Fold the crust over the apple filling in a rustic pattern. Your pie will end up only about 8 - 9" in diameter after the crust is folded over the filling.
Refrigerate the crostata for 20-30 minutes. In the meantime, set your oven racks to the lower third of the oven and preheat the oven to 400.
Brush the crust of your refrigerated pie with the egg wash and sprinkle with sugar.
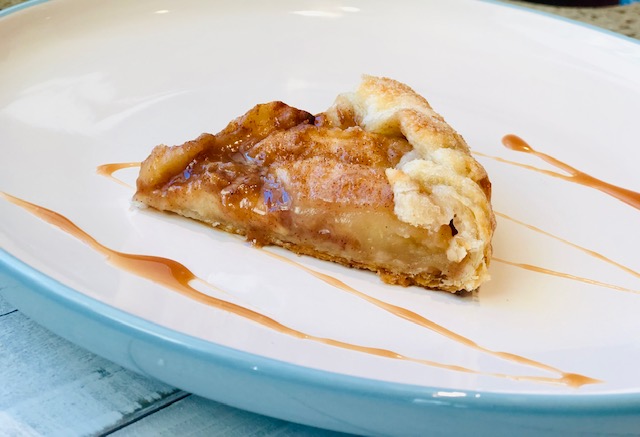
Bake in preheated oven for about 40 minutes. The filling should be bubbly, the crust should be golden. Gently lift up your crostata to ensure the bottom crust is golden and crispy as well.
Let cool for at least 10 minutes and slice into 4-6 wedges. This could be served at room temperature or warm.
Ingredients
Directions
Roll your pie crust to about 12" circle in diameter. Place it on an inverted baking sheet, cover with plastic wrap and refrigerate for at least an hour.
Combine apples, lemon juice, lemon zest, salt, cinnamon, nutmeg, coves, allspice, sugars. Toss well. Allow to sit at room temperature for at least half an hour. I usually let it sit even a bit longer, up to two hours. This process is called maceration and after just half an hour, the juices will be drawn out from the apples and collect on the bottom of your bowl. By doing this step, we help prevent soggy bottom crust.
Carefully strain these delicious fragrant juices into a small saucepan and simmer to thicken them up slightly. Perhaps 3-4 minutes over medium-low heat. Be careful not to reduce too much - we are simply looking to thicken this "apple caramel" slightly.
Toss apples with flour.
Take the crust out of the fridge and fill the crust with apples leaving 1 1/2" - 2" of the crust unfilled. Your apples will guide the shape of the crostata, and 3 apples typically form 8" circle placed in a single layer. Gently pour your "apple caramel" over the apples. Dot your apple filling with butter. Fold the crust over the apple filling in a rustic pattern. Your pie will end up only about 8 - 9" in diameter after the crust is folded over the filling.
Refrigerate the crostata for 20-30 minutes. In the meantime, set your oven racks to the lower third of the oven and preheat the oven to 400.
Brush the crust of your refrigerated pie with the egg wash and sprinkle with sugar.
Bake in preheated oven for about 40 minutes. The filling should be bubbly, the crust should be golden. Gently lift up your crostata to ensure the bottom crust is golden and crispy as well.
Let cool for at least 10 minutes and slice into 4-6 wedges. This could be served at room temperature or warm.
And here’s the recipe for my foolproof pie crust:
This recipe makes 1 pie crust. Feel free to double it if making 2 pies or one double-crusted pie.
Add the flour, salt, sugar and butter to the bowl of your stand mixer. Place the paddle attachment into the bowl and place everything into the fridge to chill. Every ingredient as well as everything that touches the dough should be very cold. Chill for at least half an hour.
When chilled, set up the paddle attachment and mix on low until the flour resembles coarse crumbs. You are not looking for small pea sized crumbs - you are looking for large fluffy crumbs. Basically all of those 1/2" cubes should be gently smashed by the mixer without turning into a mealy powder.
With the mixer running on low, add water in a steady stream. Mix for one minute. The dough should be really smooth. You may even mix it for up to two minutes. Contrary to what we are told about overmixing pie dough - you are safe here because everything is very cold and the flour granules are well coated with butter preventing excessive gluten development. Your dough should be quite smooth.
Next, you have two choices:
- Roll out your dough to the required shape on a well floured surface. Don't be afraid of flour and use it liberally, simply brush it off after you are done rolling. This is what I do with great results to save time - I roll it out immediately.
- Or, form into a disk, cover with plastic wrap and refrigerate for at least an hour. Then proceed to rolling your dough.
The important thing is to roll the dough to 3-4mm. It's 1/8 of an inch or just under to about 14 inches in diameter. Use this pie crust as directed in your recipe. (Be sure to chill the dough for at least an hour, ideally two, after you roll it out and shape it into your pie plate.)
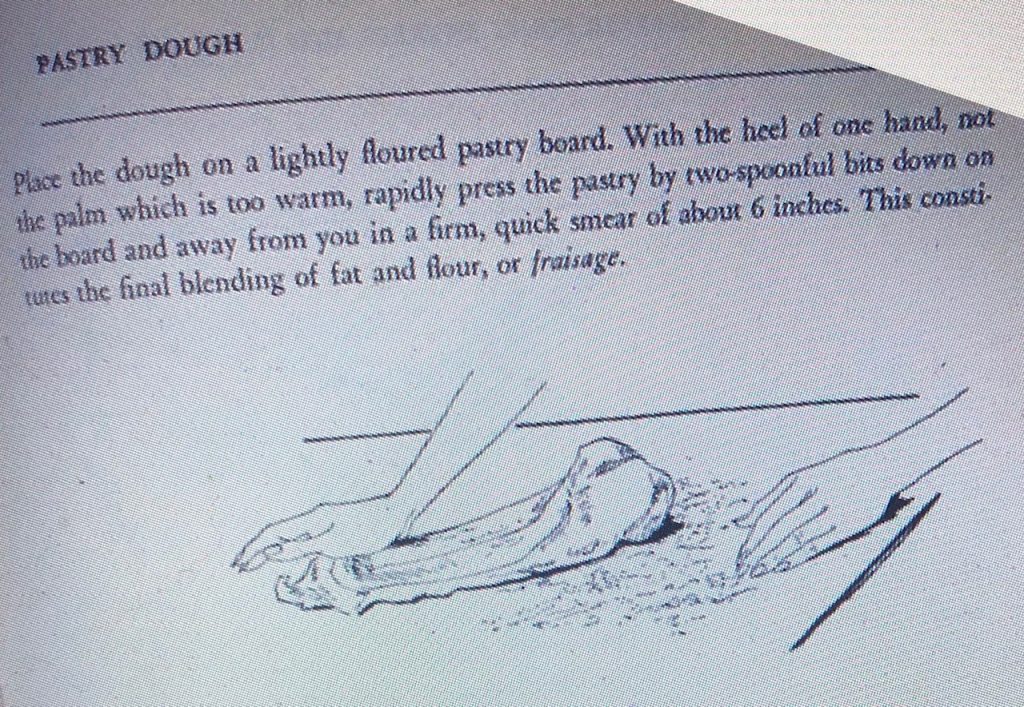
We will need to loosely employ a French technique called Fraisage. Place all of your ingredients in a large bowl, ensure the butter cubes are coated with flour. Squish each butter cube with the heel of your hand, and move your hand forward smearing the butter cube by about an inch. As a result you will get large thin flakes of butter. Pour cold water over the flour and knead with your hands (or with a fork at first) until the mixture comes together into smooth dough. Proceed to step # 4.
Ingredients
Directions
Add the flour, salt, sugar and butter to the bowl of your stand mixer. Place the paddle attachment into the bowl and place everything into the fridge to chill. Every ingredient as well as everything that touches the dough should be very cold. Chill for at least half an hour.
When chilled, set up the paddle attachment and mix on low until the flour resembles coarse crumbs. You are not looking for small pea sized crumbs - you are looking for large fluffy crumbs. Basically all of those 1/2" cubes should be gently smashed by the mixer without turning into a mealy powder.
With the mixer running on low, add water in a steady stream. Mix for one minute. The dough should be really smooth. You may even mix it for up to two minutes. Contrary to what we are told about overmixing pie dough - you are safe here because everything is very cold and the flour granules are well coated with butter preventing excessive gluten development. Your dough should be quite smooth.
Next, you have two choices:
- Roll out your dough to the required shape on a well floured surface. Don't be afraid of flour and use it liberally, simply brush it off after you are done rolling. This is what I do with great results to save time - I roll it out immediately.
- Or, form into a disk, cover with plastic wrap and refrigerate for at least an hour. Then proceed to rolling your dough.
The important thing is to roll the dough to 3-4mm. It's 1/8 of an inch or just under to about 14 inches in diameter. Use this pie crust as directed in your recipe. (Be sure to chill the dough for at least an hour, ideally two, after you roll it out and shape it into your pie plate.)
We will need to loosely employ a French technique called Fraisage. Place all of your ingredients in a large bowl, ensure the butter cubes are coated with flour. Squish each butter cube with the heel of your hand, and move your hand forward smearing the butter cube by about an inch. As a result you will get large thin flakes of butter. Pour cold water over the flour and knead with your hands (or with a fork at first) until the mixture comes together into smooth dough. Proceed to step # 4.