
This restaurant quality homemade pizza is perfect for just about any occasion. Family dinners, leftover lunches. It’s also perfect for entertaining – as it is very cost effective and even fun (think about make your own pizza dinner party!)
Despite the lengthy instructions, the process of making this perfected pizza is not hard at all! In this recipe, I’m listing all of the tips and techniques to help perfect homemade pizza.
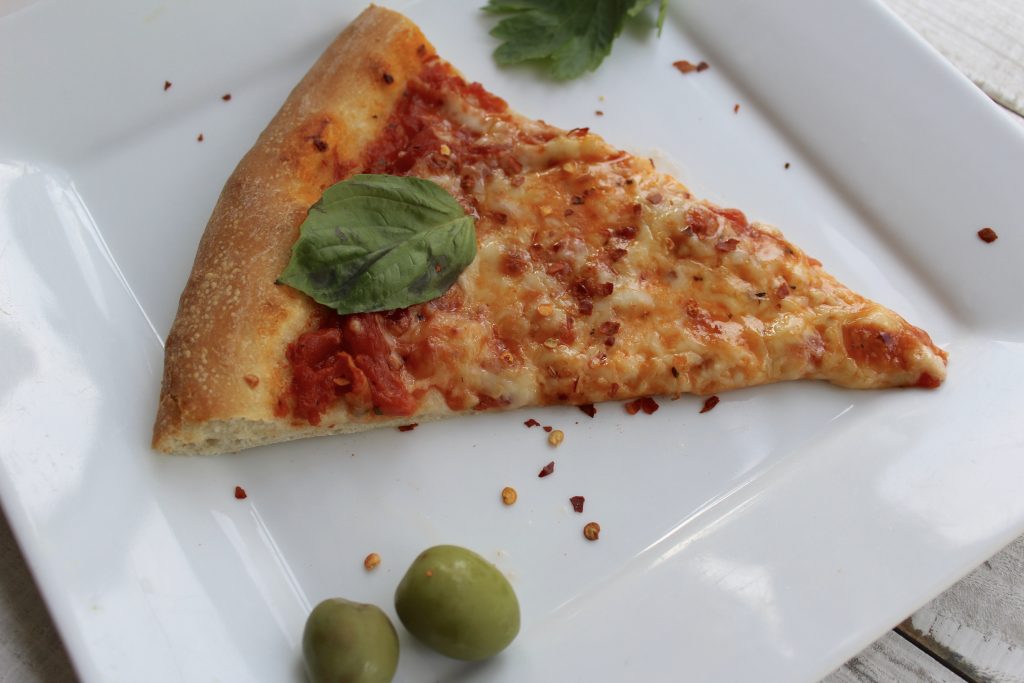
Instead of adding an infinite amount of pizza variations, I’m sharing my template pizza recipe – simple cheese pizza. Feel free to top it with any other additional toppings of choice.
The most essential step for making the perfect pizza dough is to never bake it the same day it’s made. Slow proofing of the dough in the fridge for at least overnight (and up to 3 days) will result in much better flavour!
Made this recipe? I would love to hear from you. Have you tried other toppings, please do share your pix!!

Ingredients (proportions only) adapted from Bobby Flay.
Must be prepared 24 hours up to 3 days in advance.
Combine the first 4 ingredients in a bowl of your stand mixer and whisk or mix together. Because we are using instant yeast, we do not need the extra step of proofing it. With the mixer running, add water and oil.
Knead until the dough pulls away from the sides and the bottom of the mixing bowl. Note, the brand of flour used, weather conditions, the way you measured your flour (was it spooned into your measuring cup or did you scoop the flour out of the bag) and other fluctuating variables determine whether you will need more flour or not. 3 and ½ cups is a good place to start, but if the dough is still sticking to the bottom of the bowl, add more flour 1 tablespoon at a time. Continue kneading for about 7-10 minutes.
When you are happy with your dough, turn it out on a lightly floured surface and knead with your hand.
This next optional step is what will be responsible for taking your pizza to the next level. Rip a small amount of dough, roughly the size of a golf ball, and stretch it with your fingers to make a little square or rectangular shape. This process is called “passing a windowpane test.” For your pizza to be perfectly kneaded, easy to stretch and chewy – the glutens in the flour must be worked enough, so that when you spread the dough with your fingers, it holds a shape of a window without ripping. If it does, great, you are done. If not, continue kneading until the windowpane test is passed. You may need to toss it back in your mixer and add more flour as needed.
When finished kneading, divide your dough into two portions. Place each portion in a large Ziplock bag or a lightly greased container of choice. Put your pizza dough in the fridge. It should not be used the same day you make it. I most enjoy it after it has risen in the fridge for 48 hours, but anywhere between 24 hours and 4 days will work.
Sautee garlic, oregano, basil and red pepper flakes in oil and butter, two minutes or so, do not brown. Add tomatoes sauce, sugar and the whole onion, split in half, and bring to simmer.
Simmer uncovered for about 45-50 minutes on low heat. Scoop out onion chunks and refrigerate the sauce until needed. This recipe makes enough for two large pizzas. Check on the sauce periodically to ensure its not reducing too much.
Take each portion of the dough out of the fridge and with floured hands form each portion into a ball; place on clean surface and cover with plastic wrap and a kitchen towel to keep it from drying out. Let it sit at room temperature for about 2 hours until doubled in size.
At least 45 minutes before baking the pizza, preheat your over to 500. Place your pizza stone, or inverted heavy aluminum rimmed baking sheet into the oven while the oven is preheating.
This dough is an absolute delight to work with. The gluten is well developed, so unlike many other dough recipes, you will not need to roll this dough and will be easily able to stretch it by hand. Place a portion of your dough on a large piece of parchment paper, lightly floured, pressing it down into a circle. At that point, pick up the dough and gently stretch it out. You can do so my rotating the pizza as you gently hold the edge of the pizza; use your fists to assist with the stretching of the dough. Remember when the dough passed the windowpane test – because of that, this dough, stretched gently should not tear and could be stretched into quite a large, thin crust pizza. If you prefer a thicker crust, by all means, stretch the dough less.
Top the dough with half of your homemade pizza sauce and mozzarella cheese. Using another baking sheet (I use thin cutting board) transfer the dough to the oven and bake in preheated oven for 12-14 minutes until cheese is melted and the dough is nicely browned. If you make really thin crust, it may take less than 12 minutes.
Remove from the oven, slice and enjoy. These pizzas are baked one at a time so repeat steps 8-9 with the second portion.
Remember, you can add any toppings of your choice. Want pepperoni pizza – go ahead, add some sliced pepperoni! There are so many theories on what goes on pizza and what does not. I know it’s a culinary sin to put barbeque sauce on pizza – yet I absolutely love it and barbeque chicken pizza is my favourite! There's no right or wrong!
Ingredients
Directions
Must be prepared 24 hours up to 3 days in advance.
Combine the first 4 ingredients in a bowl of your stand mixer and whisk or mix together. Because we are using instant yeast, we do not need the extra step of proofing it. With the mixer running, add water and oil.
Knead until the dough pulls away from the sides and the bottom of the mixing bowl. Note, the brand of flour used, weather conditions, the way you measured your flour (was it spooned into your measuring cup or did you scoop the flour out of the bag) and other fluctuating variables determine whether you will need more flour or not. 3 and ½ cups is a good place to start, but if the dough is still sticking to the bottom of the bowl, add more flour 1 tablespoon at a time. Continue kneading for about 7-10 minutes.
When you are happy with your dough, turn it out on a lightly floured surface and knead with your hand.
This next optional step is what will be responsible for taking your pizza to the next level. Rip a small amount of dough, roughly the size of a golf ball, and stretch it with your fingers to make a little square or rectangular shape. This process is called “passing a windowpane test.” For your pizza to be perfectly kneaded, easy to stretch and chewy – the glutens in the flour must be worked enough, so that when you spread the dough with your fingers, it holds a shape of a window without ripping. If it does, great, you are done. If not, continue kneading until the windowpane test is passed. You may need to toss it back in your mixer and add more flour as needed.
When finished kneading, divide your dough into two portions. Place each portion in a large Ziplock bag or a lightly greased container of choice. Put your pizza dough in the fridge. It should not be used the same day you make it. I most enjoy it after it has risen in the fridge for 48 hours, but anywhere between 24 hours and 4 days will work.
Sautee garlic, oregano, basil and red pepper flakes in oil and butter, two minutes or so, do not brown. Add tomatoes sauce, sugar and the whole onion, split in half, and bring to simmer.
Simmer uncovered for about 45-50 minutes on low heat. Scoop out onion chunks and refrigerate the sauce until needed. This recipe makes enough for two large pizzas. Check on the sauce periodically to ensure its not reducing too much.
Take each portion of the dough out of the fridge and with floured hands form each portion into a ball; place on clean surface and cover with plastic wrap and a kitchen towel to keep it from drying out. Let it sit at room temperature for about 2 hours until doubled in size.
At least 45 minutes before baking the pizza, preheat your over to 500. Place your pizza stone, or inverted heavy aluminum rimmed baking sheet into the oven while the oven is preheating.
This dough is an absolute delight to work with. The gluten is well developed, so unlike many other dough recipes, you will not need to roll this dough and will be easily able to stretch it by hand. Place a portion of your dough on a large piece of parchment paper, lightly floured, pressing it down into a circle. At that point, pick up the dough and gently stretch it out. You can do so my rotating the pizza as you gently hold the edge of the pizza; use your fists to assist with the stretching of the dough. Remember when the dough passed the windowpane test – because of that, this dough, stretched gently should not tear and could be stretched into quite a large, thin crust pizza. If you prefer a thicker crust, by all means, stretch the dough less.
Top the dough with half of your homemade pizza sauce and mozzarella cheese. Using another baking sheet (I use thin cutting board) transfer the dough to the oven and bake in preheated oven for 12-14 minutes until cheese is melted and the dough is nicely browned. If you make really thin crust, it may take less than 12 minutes.
Remove from the oven, slice and enjoy. These pizzas are baked one at a time so repeat steps 8-9 with the second portion.
Remember, you can add any toppings of your choice. Want pepperoni pizza – go ahead, add some sliced pepperoni! There are so many theories on what goes on pizza and what does not. I know it’s a culinary sin to put barbeque sauce on pizza – yet I absolutely love it and barbeque chicken pizza is my favourite! There's no right or wrong!
Make it Vegetarian: this cheese pizza is already naturally vegetarian. Feel free to load it up with pre-cooked veggies and do not add any meat.