I’m pulling all the stops with this cake, taking on a new take with this old fave!
I’m melting dark chocolate directly into the batter, I’m using simple syrup that professional bakers swear by and on top of that, I perfect the step by step technique that will result in more density and moisture to the cake.
For the buttercream, I decided to go with my basic chocolate buttercream. It’s easy to make, extremely delicious and is always a crowd pleaser.
If you are interested, you can make this cake with my Chocolate Swiss Meringue Buttercream. It’s so elevated and elegant. However, I really love the American buttercream in this cake – it’s a lot more sturdy, foolproof and easier to make.
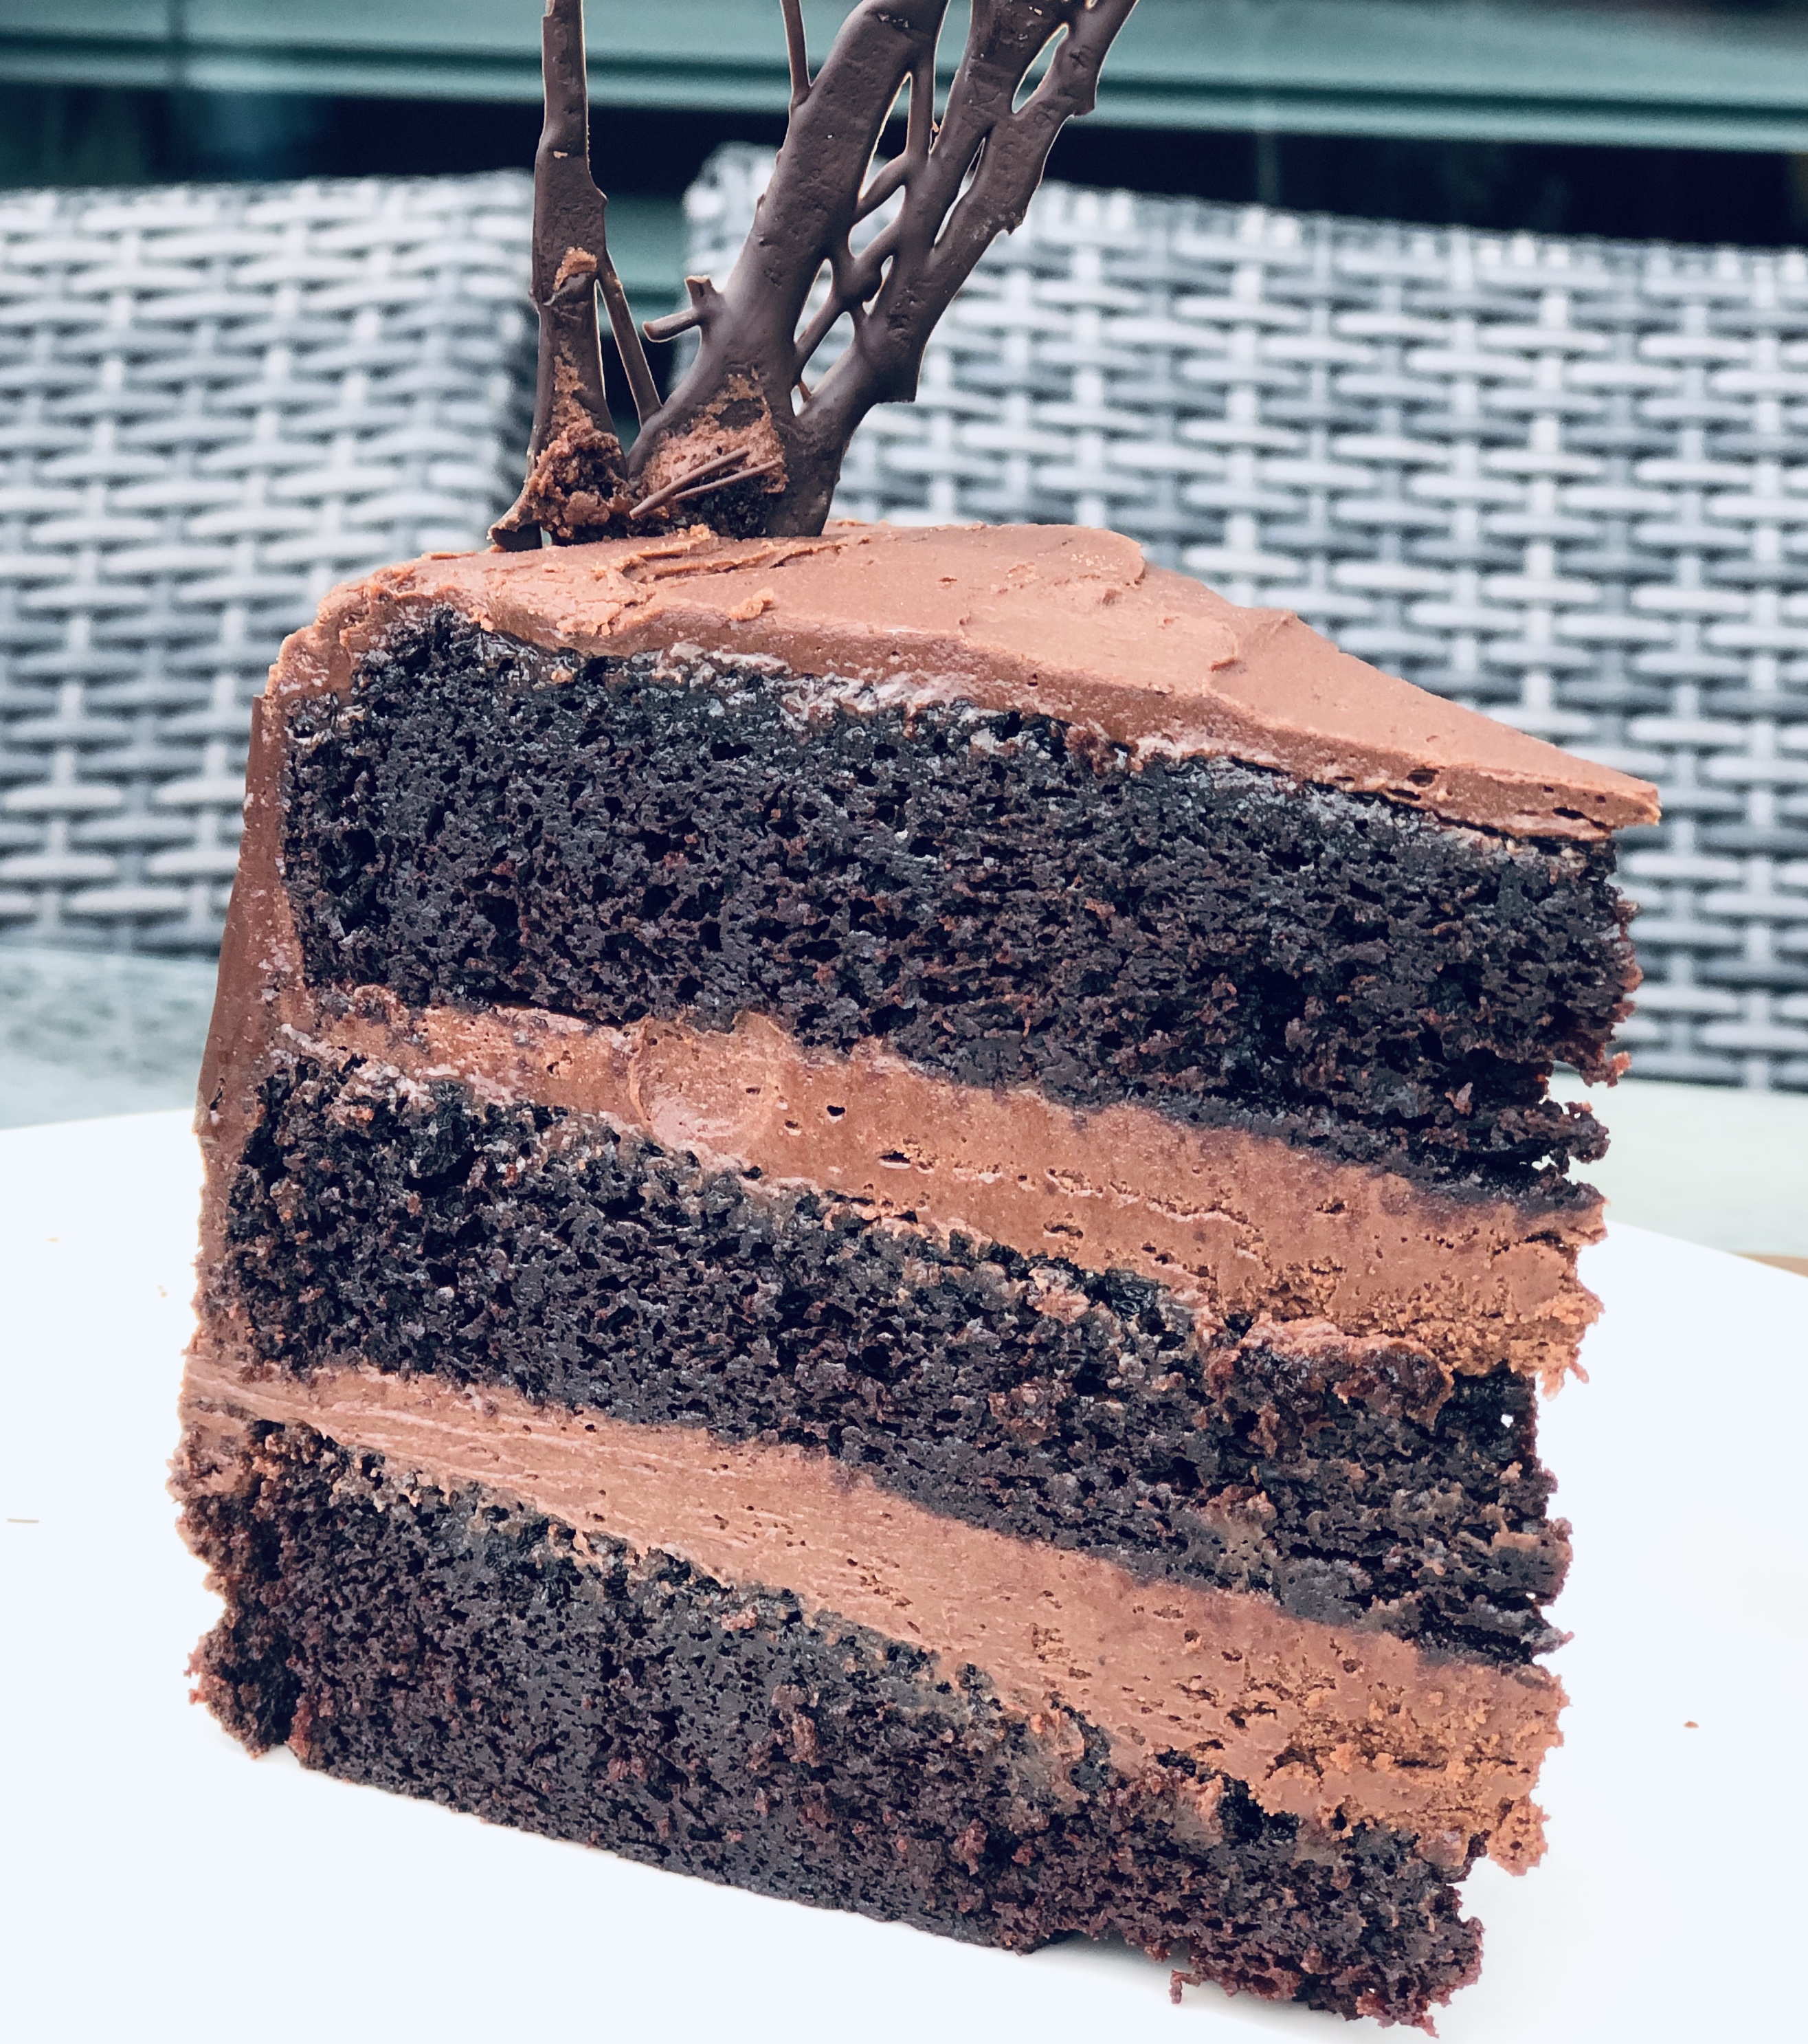
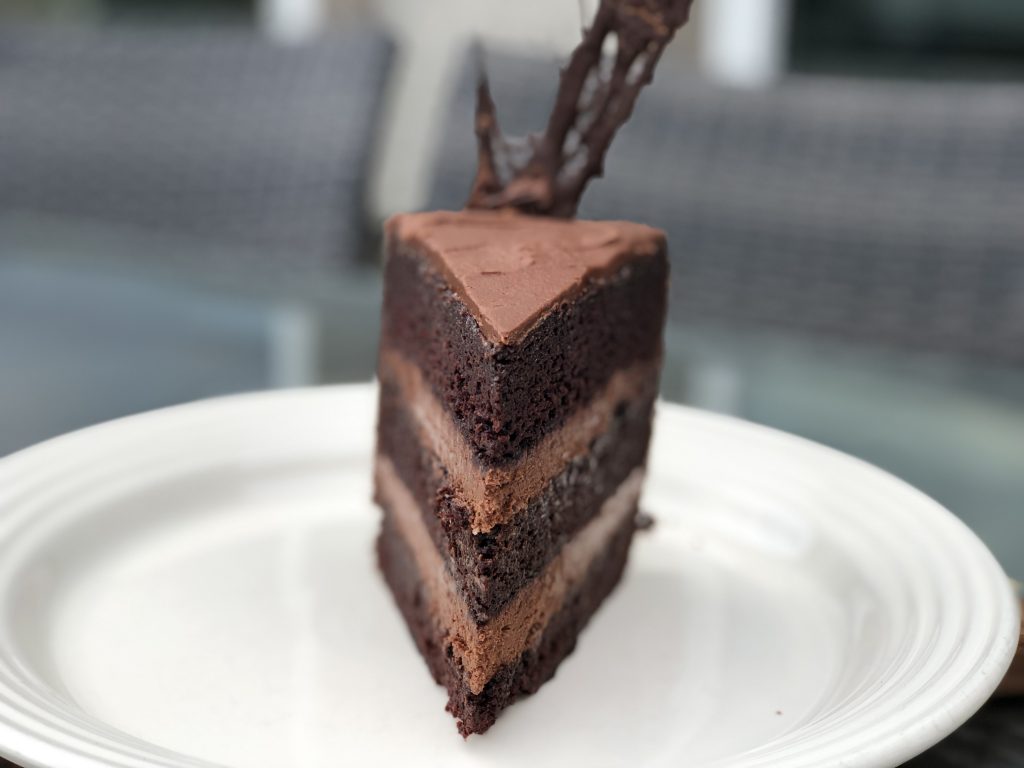
This cake is completely perfect. So if you are looking for a classic, light and rich chocolate cake, look no further! I stand by my claim that this is the best chocolate cake ever.
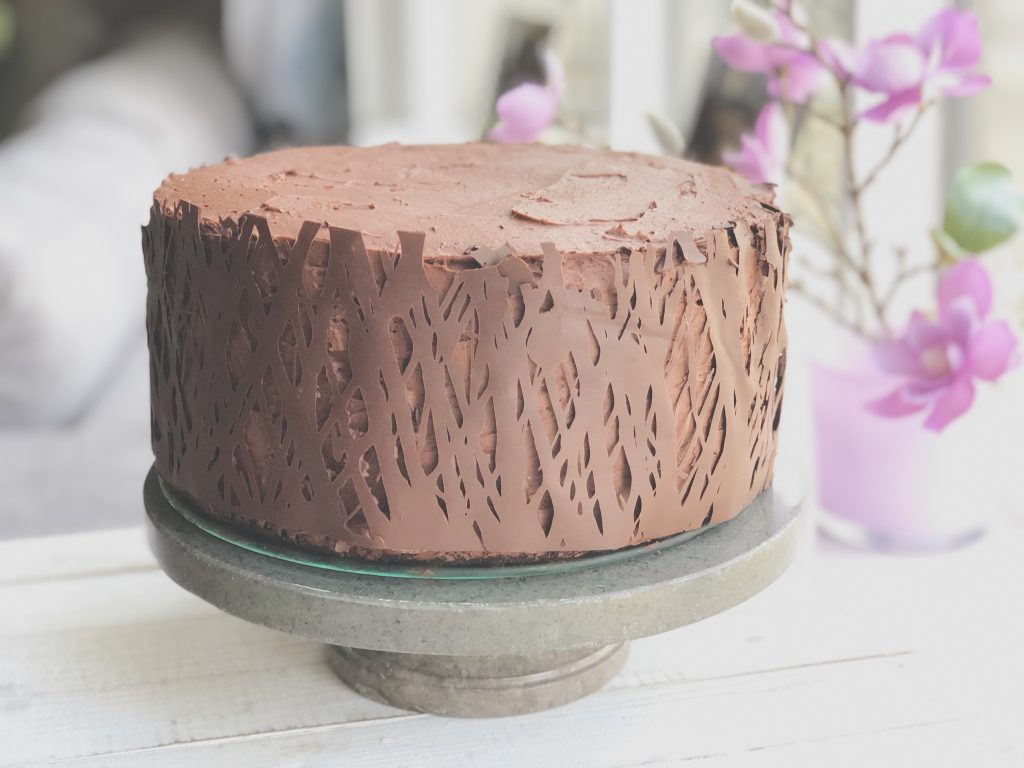
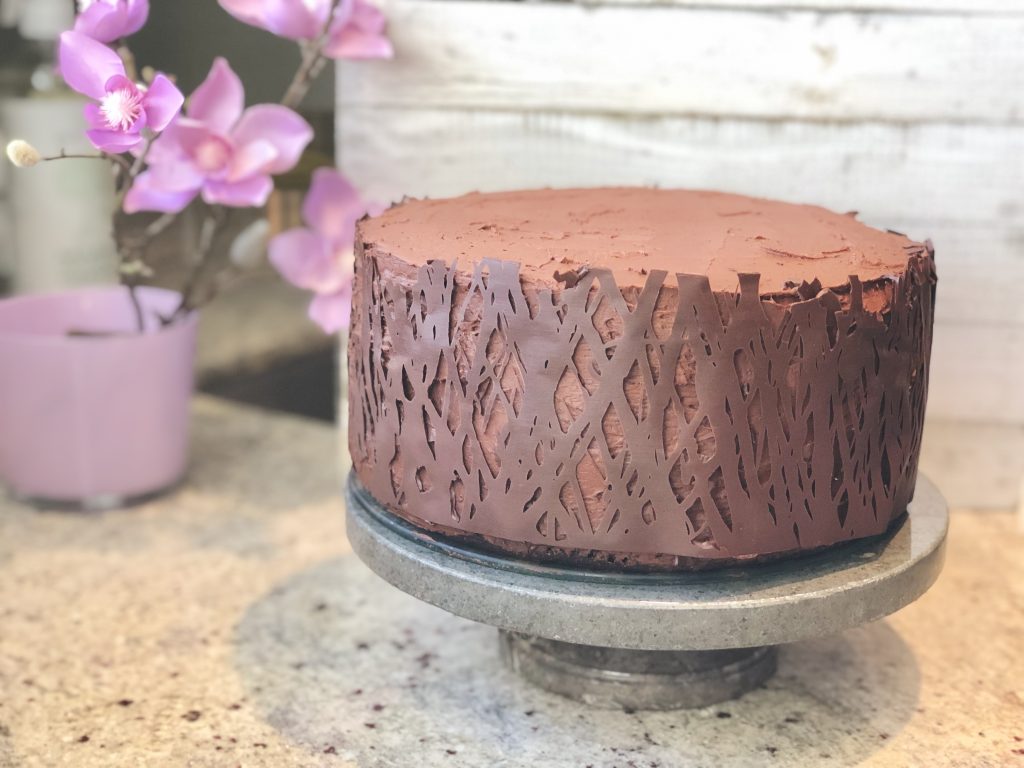
For the garnish, I had multiple ideas. I was thinking about thick chocolate ganache running down the sides of the cake and topping the cake with some raspberries. Unfortunately, my raspberries weren’t in the best shape, so I left them out. Then I discovered I had no cream to make the ganache. Instead I drizzled melted dark chocolate on a long sheet of parchment – long enough to wrap around the whole cake, 1/2″ taller than the height of the cake, let it set in the fridge for just a few minutes until pliable but no longer liquid, then wrapped it around the diameter of the cake. Quick, simple, elegant and one more dark chocolatey element.
I hope you guys make this cake. Prepare to be in for quite a treat!
NOTE: I do not recommend baking this cake in cupcake tins or as a sheet cake in a large 18×13 pan. This cake needs height to retain moisture and not be too crumbly. It can be baked in 9×13 pan, 2 9″ pans or 2 8″ pans.
With a few adjustments, this cake could be turned into a phenomenal low maintenance sheet cake or out of this world moist, light and rich cupcakes. For those variations, I swap butter for the oil and reduce the amount of buttercream – in order to adjust for a larger cooking surface and make it more sturdy.
One-Pot easy and quick preparation sheet cake recipe could be found here.
Cupcakes recipe, could be found here.
Before we start:
- Preheat the oven to 300 and place the racks to the centre position.
- Place 3.5 ounces of dark chocolate in a heat safe bowl over a pot of simmering water (you just created a double boiler.) Melt it stirring occasionally. When melted, set aside and allow to cool.
- Make the coffee and keep it warm, If you have a quick making Tassimo or Keurig machine, get everything ready, but make it last minute.
- Line 2 9" springform pans with parchment, grease it lightly and lightly dust with flour (use a sifter.)
Sift all of your dry ingredients into a large bowl. The goal here is to incorporate everything and aerate it. If you used kosher salt, it will not get through your fine-mesh-sieve. No worries, just dump the trapped kosher salt into the rest of the sifted ingredients. Give everything a nice stir with a whisk.
In the bowl of a stand mixer mix oil, vanilla and buttermilk on low. Increase it to medium low and beat for about 30 seconds. With the mixer running, add 3 eggs, one at a time, ensuring the egg is fully incorporated before adding the next one. Continue mixing on low until homogenous off-white mixture.
With the mixer on low, start adding your sifted dry ingredients one tablespoon at a time. Mix only until the mixture comes together; as overmixing will result in a tough cake. You will basically be adding spoonfuls of flour almost continuously as each tablespoon will incorporate quite fast.
When incorporated, stop your mixer and go get your hot coffee and your chocolate. Turn the mixer to low and slowly pour your hot coffee in a continuous stream. Pouring it fast will cook the eggs, but slow steady stream will gradually warm up the batter and avoid cooking the eggs. Pour in your melted chocolate. Mix everything on low for 30-60 seconds. Divide the batter among two prepared greased pans.
Bake in preheated oven for 35-45 minutes. Check after 30 minutes. The middle of the cake will likely be still wet and jiggly. It that's the case, it's not ready yet, keep baking. When the middle feels more firm and more set, and when you press with your finger, a little indentation is left - the cake should be about done. The internal temperature of this cake should be 202-205 in the centre of the cake measured with a good digital thermometer. Test a few spots and insert at 45° angle to avoid testing errors. Do not overcook this case as the texture and moisture level will be compromised.
Remove the cakes from the oven and cool on wire racks in their pans. Do not try to remove them while warm – the cakes are very delicate with a fine crumb. If removed while warm – they will break and fall apart.
While the cakes are cooling, make the syrup. Bring water and sugar to a boil. Boil for 15 seconds. The sugar granules will visibly disappear. Remove from heat and set aside to cool.
In a bowl of a stand mixer, mix all of the icing ingredients on low at first (to avoid all of the sugar and cocoa from splashing everywhere.) When everything is incorporated, increase the speed to high and beat for a few minutes until fluffy and lightened in colour. Stop the mixer, scrape the sides of the bowl and beat on high for another minute or two. Set aside.
Run a butter knife around the surface of the cake (between the cake and the cake pan.) Release the springform pans and invert each cake on an even surface.
*If your cakes are not even, consider leveling them by gently shaving off the parts of the cakes that domed with a long serrated knife.
The side with the parchment paper should be facing upwards. Peel the parchment and brush each cake with simple syrup. Set aside for a few minutes for the syrup to set and harden. Ideally, cover each layer with parchment paper and freeze for 15-30 minutes. It's a trick professional bakers use to make the icing of the cake easier.
Assemble the cake by spreading the buttercream evenly between the layers. Decorate the cake as desired.
NOTE:
- More expensive Dutch-process cocoa powder makes a huge difference in this cake, compared to the yellow round boxes sold at a grocery store. It's not necessary but does make a remarkable difference.
- Measuring the internal temperature of the cake makes a huge difference. Getting the cake out of the oven in 202-205 range will result in a moist out of this world cake and avoid any possibility of overcooking the cake.
-Consider variations such as a sheet cake or cupcakes.
- No buttermilk? No problem. Put one tablespoon of white vinegar or 1.5 tablespoons of fresh lemon juice in your cup measure. Fill the rest with milk. Allow it to sit at room temperature for 10 minutes to thicken and turn into "homemade buttermilk"
- I find this cake to be at its best the following day - it becomes even more moist and tender. I refrigerate prepared iced cake and allow it to come to room temperature before serving.
Ingredients
Directions
Before we start:
- Preheat the oven to 300 and place the racks to the centre position.
- Place 3.5 ounces of dark chocolate in a heat safe bowl over a pot of simmering water (you just created a double boiler.) Melt it stirring occasionally. When melted, set aside and allow to cool.
- Make the coffee and keep it warm, If you have a quick making Tassimo or Keurig machine, get everything ready, but make it last minute.
- Line 2 9" springform pans with parchment, grease it lightly and lightly dust with flour (use a sifter.)
Sift all of your dry ingredients into a large bowl. The goal here is to incorporate everything and aerate it. If you used kosher salt, it will not get through your fine-mesh-sieve. No worries, just dump the trapped kosher salt into the rest of the sifted ingredients. Give everything a nice stir with a whisk.
In the bowl of a stand mixer mix oil, vanilla and buttermilk on low. Increase it to medium low and beat for about 30 seconds. With the mixer running, add 3 eggs, one at a time, ensuring the egg is fully incorporated before adding the next one. Continue mixing on low until homogenous off-white mixture.
With the mixer on low, start adding your sifted dry ingredients one tablespoon at a time. Mix only until the mixture comes together; as overmixing will result in a tough cake. You will basically be adding spoonfuls of flour almost continuously as each tablespoon will incorporate quite fast.
When incorporated, stop your mixer and go get your hot coffee and your chocolate. Turn the mixer to low and slowly pour your hot coffee in a continuous stream. Pouring it fast will cook the eggs, but slow steady stream will gradually warm up the batter and avoid cooking the eggs. Pour in your melted chocolate. Mix everything on low for 30-60 seconds. Divide the batter among two prepared greased pans.
Bake in preheated oven for 35-45 minutes. Check after 30 minutes. The middle of the cake will likely be still wet and jiggly. It that's the case, it's not ready yet, keep baking. When the middle feels more firm and more set, and when you press with your finger, a little indentation is left - the cake should be about done. The internal temperature of this cake should be 202-205 in the centre of the cake measured with a good digital thermometer. Test a few spots and insert at 45° angle to avoid testing errors. Do not overcook this case as the texture and moisture level will be compromised.
Remove the cakes from the oven and cool on wire racks in their pans. Do not try to remove them while warm – the cakes are very delicate with a fine crumb. If removed while warm – they will break and fall apart.
While the cakes are cooling, make the syrup. Bring water and sugar to a boil. Boil for 15 seconds. The sugar granules will visibly disappear. Remove from heat and set aside to cool.
In a bowl of a stand mixer, mix all of the icing ingredients on low at first (to avoid all of the sugar and cocoa from splashing everywhere.) When everything is incorporated, increase the speed to high and beat for a few minutes until fluffy and lightened in colour. Stop the mixer, scrape the sides of the bowl and beat on high for another minute or two. Set aside.
Run a butter knife around the surface of the cake (between the cake and the cake pan.) Release the springform pans and invert each cake on an even surface.
*If your cakes are not even, consider leveling them by gently shaving off the parts of the cakes that domed with a long serrated knife.
The side with the parchment paper should be facing upwards. Peel the parchment and brush each cake with simple syrup. Set aside for a few minutes for the syrup to set and harden. Ideally, cover each layer with parchment paper and freeze for 15-30 minutes. It's a trick professional bakers use to make the icing of the cake easier.
Assemble the cake by spreading the buttercream evenly between the layers. Decorate the cake as desired.
NOTE:
- More expensive Dutch-process cocoa powder makes a huge difference in this cake, compared to the yellow round boxes sold at a grocery store. It's not necessary but does make a remarkable difference.
- Measuring the internal temperature of the cake makes a huge difference. Getting the cake out of the oven in 202-205 range will result in a moist out of this world cake and avoid any possibility of overcooking the cake.
-Consider variations such as a sheet cake or cupcakes.
- No buttermilk? No problem. Put one tablespoon of white vinegar or 1.5 tablespoons of fresh lemon juice in your cup measure. Fill the rest with milk. Allow it to sit at room temperature for 10 minutes to thicken and turn into "homemade buttermilk"
- I find this cake to be at its best the following day - it becomes even more moist and tender. I refrigerate prepared iced cake and allow it to come to room temperature before serving.

The optional wet ingredient. Dark chocolet is it suppose to be sweetened. Unsweetened.. Or semi-sweet? Thank you